
Lawn
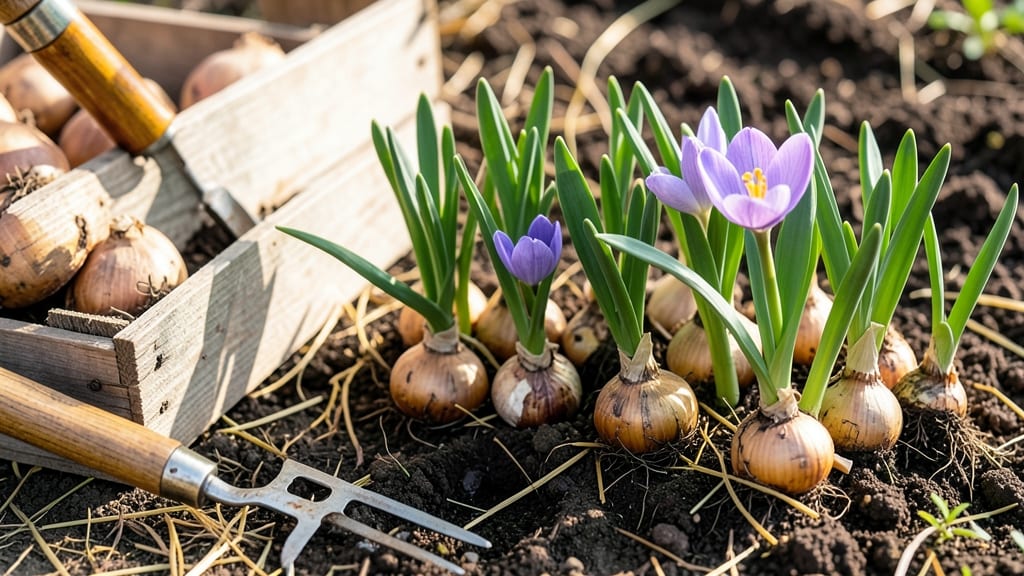
Planting bulbs in lawns transforms dull green into a springtime explosion of color—without the backbreaking digging. 🌱 The secret lies in timing (fall, not spring) and choosing the right varieties like crocus or grape hyacinths that peek through grass like tiny green surprises.
Most people mess this up by waiting until spring, but bulbs need 6-8 weeks of cool soil to root before winter. A simple trick: scatter them after your lawn stops growing but before the ground freezes.
No need for fancy tools—just a shovel, some bulbs, and a light covering of soil. You’ll wake up to vibrant blooms pushing through grass, with minimal lawn disruption. The grass grows right over them, hiding the flowers until they burst forth in late winter or early spring.
Mulching lightly in fall helps retain moisture while protecting the bulbs. Works for any lawn size, from small front yards to large back fields. Here’s how to make it effortless—and beautiful—every year.
📚 In This Guide
- What you need
- Instructions
- Tips and common mistakes
- Wrapping up and next steps
What you need
- ● Spring-flowering bulbs: 10–20 bulbs per 100 sq. ft. (e.g., daffodils, tulips, crocuses—choose varieties labeled "naturalizing" or "lawn-friendly").
- ● Fall-planting bulbs: 15–30 bulbs per 100 sq. ft. (e.g., alliums, hyacinths, snowdrops—opt for smaller bulbs for easier planting).
- ● Bulb planter or bulb augur: A handheld tool (e.g., Fiskars Bulb Planter) for planting without digging.
- ● Garden gloves: A pair to protect hands from soil and sharp bulb edges.
- ● Watering can or hose with a gentle spray nozzle: For post-planting hydration (avoid heavy water pressure).
- ○ Organic mulch (optional): 1–2 inches of shredded bark or compost to retain moisture and suppress weeds.
- ● Bulb fertilizer: A slow-release, bulb-specific formula (e.g., Osmocote Bulb Booster) to nourish roots.
- ● Lawn seed blend: For patchy areas (choose a mix with fine fescue or creeping red fescue for shade tolerance).
- ● Grass seed marker flags: To mark planted areas and avoid mowing over new bulbs.
- ● Knee pad or small stool: For comfort during planting (especially for larger lawns!).
Step-by-Step guide to planting bulbs directly in your lawn
Here's how to transform your lawn into a natural, low-maintenance garden—no digging trenches required.
🌱 Step 1: Choose the Right Bulbs for Year-Round Interest
Select bulbs that thrive in grass and bloom at different times. Daffodils, crocuses, and alliums are tough enough to push through grass, while tulips need a little more care. I always pick varieties labeled "lawn-tolerant" or "naturalizing" for best results. Check your hardiness zone to match bulbs with your climate—most need planting in fall, 6-8 weeks before first frost.
For a 4-square-foot area, you'll need about 20-30 bulbs spaced 4-6 inches apart. Larger bulbs like daffodils can handle closer spacing, while smaller ones like snowdrops need a little more room. Mix heights and bloom times to ensure continuous color from early spring through summer.
✂️ Step 2: Prepare the Lawn Without Digging
Mark your planting area with stakes or spray paint. Use a manual lawn aerator to create small holes—about 4-6 inches deep—where the bulbs will go. This avoids the need for trenches while still giving roots room to establish. I like to work in a grid pattern for an even look, spacing holes 4-6 inches apart to match bulb spacing.
If your lawn is thick, consider using a soil knife or bulb planter to make individual holes instead. The key is to disturb the grass as little as possible while still providing enough space for the bulbs to grow. Water the area lightly before planting to help settle the soil.
🌿 Step 3: Plant Bulbs and Recover the Grass
Place each bulb in its hole with the pointed end facing up. Cover lightly with soil, leaving about 1-2 inches of grass above the bulb—this helps insulate them over winter. Press the soil gently around the bulb to remove air pockets, but don’t pack it down too firmly. This ensures the bulb can push through the grass in spring.
After planting, water the area deeply to help the bulbs settle. You’ll see the grass grow right back over the bulbs, which protects them from frost and keeps them hidden until they bloom. The grass will thin slightly where the bulbs emerge in spring, but it’ll fill back in naturally over time.
☀️ Step 4: Maintain for Long-Term Blooms
Once bulbs are established, they’ll need minimal care. Water deeply once a month during dry spells—especially in the first year—to encourage strong root growth. Avoid fertilizing heavily, as this can make the grass grow too vigorously and choke out the bulbs. A light application of bulb-specific fertilizer in early fall is enough to keep them thriving.
When the foliage turns yellow after blooming, resist the urge to cut it back. Let it die back naturally—this feeds the bulb for next year’s flowers. You can trim it down once it turns brown, but leave at least half the leaves to ensure the bulb stores enough energy for the following season.
⏰ Step 5: Plan for Seasonal Changes
In early spring, you’ll notice shoots pushing through the grass. Don’t panic—this is normal! The grass may thin slightly where the bulbs bloom, but it’ll recover. If you want a cleaner look, you can mow the grass slightly higher (3-4 inches) during bloom time to protect the flowers from damage.
After blooming, let the foliage die back naturally. In late summer or early fall, you can lightly rake the area to remove any dead leaves or debris, but avoid disturbing the bulbs. This keeps the area tidy while allowing the bulbs to prepare for next year’s growth.
Tips & tricks for planting bulbs directly in your lawn
Here's what I learned after transforming my own lawn—these little tricks make all the difference for long-lasting beauty.
Bulb Selection Insight: When choosing bulbs, pay attention to their naturalizing ability—this tells you how well they'll spread and return year after year. Daffodils are my top pick for lawn planting because they're tough, deer-resistant, and come back reliably. For continuous color, I always mix in crocuses for early spring blooms and alliums for late season interest—this creates a cascading effect that looks magical.
Equipment Game-Changer: Renting a manual lawn aerator from your local hardware store is a game-changer for Step 2. These machines create perfectly spaced holes without damaging the grass roots. If you don't have one, a simple soil knife works too—just make sure to sharpen the blade first for cleaner holes. Pro tip: Work in a grid pattern to maintain even spacing between your bulbs.
Planting Depth Secret: The 4-6 inch depth mentioned in Step 2 is crucial—it gives roots room to establish while keeping bulbs protected from frost. Here's my trick: Use a ruler or measuring tape to check depth after placing each bulb. For smaller bulbs like snowdrops, aim for the shallower end of this range (4 inches), while larger daffodils can handle the full 6 inches. This prevents them from being too close to the surface where they might dry out or freeze.
Seasonal Care Strategy: In Step 4, when it mentions leaving half the foliage after blooming, I take this one step further by marking these areas with small flags or landscape pins. This visual reminder prevents me from accidentally mowing down the foliage before it's ready. The flags also help me identify where the bulbs are located when I need to water or fertilize—this targeted approach ensures I'm not overdoing it on areas that don't need extra care.
Pro Tips for Bulbs In Lawn
- Here's what I learned after transforming my own lawn—these little tricks make all the difference for long-lasting beauty.
- Bulb Selection Insight: When choosing bulbs, pay attention to their naturalizing ability—this tells you how well they'll spread and return year after year.
- Equipment Game-Changer: Renting a manual lawn aerator from your local hardware store is a game-changer for Step 2.
Frequently asked questions
Got questions about adding bulbs to your lawn? You’re not alone! Here are some of the most common concerns—and their easy solutions.
What are the best bulbs for a low-maintenance lawn?
Opt for daffodils, tulips, or crocus—they’re hardy, deer-resistant, and thrive with minimal care. For year-round color, mix in alliums (spring) and snowdrops (winter). Avoid invasive types like daylilies; stick to true bulbs for hassle-free blooms.
When is the best time to plant bulbs in the lawn?
Plant fall (6–8 weeks before frost) for spring blooms—this mimics natural cycles. For summer flowers (like dahlias), plant in early spring. Avoid planting in hot summer; bulbs need cool soil to establish roots.
Can I plant bulbs in existing grass without digging?
Yes! Use a bulb planter or soil probe to poke small holes (6–8" deep). Drop bulbs in, cover with soil, and water gently. For a no-mow look, choose shortgrass-tolerant bulbs like grape hyacinths or chionodoxa.
What do I do if squirrels or deer keep eating my bulbs?
Try these tricks:
- Chili spray (mix cayenne + water) deters critters.
- Plant daffodils or alliums—their bitter taste repels pests.
- Use hardware cloth cages for high-value bulbs.
How do I keep my lawn bulbs blooming year after year?
After flowers fade, leave foliage until it browns—this feeds the bulb! Fertilize lightly in fall with bulb-specific food, and water deeply but infrequently (1" per week). Deadhead spent blooms to encourage reblooming in some varieties.
What’s a good alternative if bulbs don’t thrive in my climate?
Try spring-flowering perennials like bleeding heart or columbine, or ground covers such as ajuga or creeping thyme. For shade, heuchera or hostas add color without bulbs. Check your USDA hardiness zone for local picks!
Wrapping up and next steps
Transforming your lawn with bulbs doesn’t have to be a chore—it’s all about strategic planting, seasonal care, and a little patience. 🌱 Whether you’re adding spring blooms, winter color, or year-round texture, these tips make it easy to create a stunning landscape with minimal effort.
Now that you’re equipped with the know-how, why not start small? Pick one area of your lawn, grab a few bulbs, and give it a try—you’ll be amazed at how quickly nature rewards your effort!
Next step: Check out our seasonal planting guide for a month-by-month roadmap to keep your lawn thriving all year!