
Fertilization
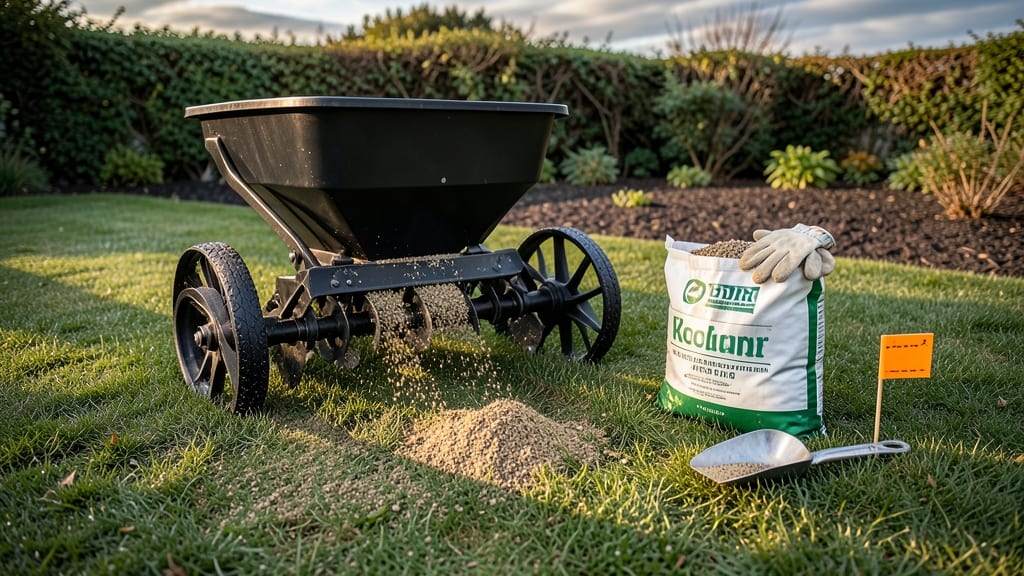
Perfect lawn coverage starts with how to use a lawn fertilizer spreader effectively—and I’ve learned the hard way that skipping calibration or speed checks ruins even the best fertilizer. 🌱 The secret isn’t just passing over the grass; it’s adjusting settings, moving at the right pace, and avoiding those telltale streaks of over- or under-application that scream "amateur hour."
Most people overlook the pre-use checks: clearing debris from the spreader’s wheels, verifying the hopper’s calibration marks, and setting the correct output rate for your fertilizer type. I used to wing it—until my lawn looked like a tie-dye experiment after the first pass.
A little prep saves hours of redoing patches later. You’ll end up with a uniform green carpet that neighbors will envy, not a patchwork of burnt spots and bare patches. The key is treating the spreader like a precision tool, not a scattergun.
Even experienced gardeners mess this up by moving too fast or overlapping passes—don’t be that person. For broadcast spreaders, walk in a crisscross pattern; for drop spreaders, use straight lines with 3-foot overlaps.
Safety first: wear gloves, avoid windy days, and keep kids/pets out of the area until the fertilizer settles. Trust me, your lawn—and your sanity—will thank you.
📚 In This Guide
- What you need
- Instructions
- Tips and common mistakes
- Wrapping up and next steps
What you need
- ● Lawn fertilizer spreader: Choose between a broadcast spreader (for even coverage) or a drop spreader (for precision). Ensure it’s calibrated for your fertilizer type (granular or liquid).
- ● Fertilizer: Select a balanced, slow-release granular fertilizer (e.g., 16-4-8 or 20-5-10 NPK ratio). Check the spread rate per 1,000 sq. ft. on the label.
- ● Measuring tools: Measuring tape or wheel (to calculate lawn area in square feet).
- ● Scale or digital kitchen scale (to measure fertilizer in ounces or grams).
- ● Safety gear: Gloves (nitrile or rubber, to protect hands from fertilizer and debris).
- ● Safety glasses (to shield eyes from dust or granules).
- ● Dust mask or respirator (if spreading in windy conditions or with fine granules).
- ● Water source: Hose with a spray nozzle (for post-application watering, if required by your fertilizer type).
- ● Calibration kit: Includes test cards or a measuring tray to fine-tune spreader settings for accurate coverage.
- ● Wheelbarrow or bucket: For mixing or transporting fertilizer (especially for large lawns).
- ● String or stakes: To mark spreading patterns (e.g., overlapping zones for even distribution).
- ● Notebook or app: To log application dates, rates, and weather conditions for future reference.
- ○ Lawn roller (lightweight): Helps settle granules into the soil after spreading (optional for granular fertilizers).
Step-by-Step instructions for mastering your lawn fertilizer spreader
Here’s the method I’ve used to transform patchy lawns into lush, even carpets—no streaks, no missed spots.
🪴 Step 1: Calibrate the Spreader for Precision
Start by measuring your lawn’s square footage. For a 4,000 sq ft lawn, you’ll need roughly 100 lbs of fertilizer applied at a rate of 25 lbs per 1,000 sq ft. Set your spreader’s dial to the manufacturer’s recommended setting for your fertilizer type—usually quarter-inch to half-inch per pass for granular products.
Walk the spreader in straight lines, overlapping slightly (about 6-12 inches) to avoid gaps. I mark a 10-foot section with stakes, then catch the fertilizer in a bucket to verify coverage. Adjust the setting if you’re getting too much or too little—this is where perfection begins.
⏰ Step 2: Prepare the Lawn for Even Distribution
Mow the lawn to a uniform height—2.5 to 3.5 inches—before spreading. Tall grass hides fertilizer, while uneven clippings create inconsistent coverage. Rake up debris and repair thin spots with seed or sod if needed. The goal is a smooth, obstacle-free surface so the spreader glides evenly.
Start at a straight edge (like a driveway or sidewalk) and work in parallel lines, stepping on the grass to compress it slightly. This prevents the spreader wheels from bouncing, which causes uneven drops. I always do a dry run first to visualize the pattern before adding fertilizer.
💧 Step 3: Apply Fertilizer in Two Perpendicular Passes
First, spread fertilizer in one direction (north to south, for example) with the spreader set to half its recommended rate. Then, make a second pass perpendicular to the first (east to west) at the same setting. This crosshatch method ensures 100% coverage without overapplying in any single spot.
Walk at a consistent, moderate pace—too fast, and you’ll miss areas; too slow, and you’ll pile fertilizer. I time myself for a 100-foot section to find my rhythm. After the second pass, do a quick visual check: the lawn should look uniformly dusted, not streaked or bare.
☀️ Step 4: Water Immediately for Activation
Within 24 hours, water the lawn deeply (1 inch) to dissolve the fertilizer and carry nutrients into the soil. I use a rain gauge to measure—1/4 inch per hour is ideal. Overwatering washes fertilizer away, while underwatering leaves it on the surface, risking burn.
For best results, water in two sessions: first, a light application to activate the fertilizer, then a deeper soak later in the day. Avoid fertilizing before heavy rain—it’ll wash away before the grass can use it. This step is non-negotiable for perfect nutrient absorption.
✂️ Step 5: Maintain the Spreader for Long-Term Performance
After each use, empty the spreader completely and clean the hopper and wheels with a damp cloth to remove residue. I store it in a dry place to prevent rust—corrosion jams mechanisms and throws off calibration. Sharpen the spreader’s metal edges annually to ensure clean cuts and even distribution.
Check the spreader’s wear points (wheels, hopper seams) every season. Replace worn parts immediately—uneven wear causes streaks or clumps. With proper care, a well-maintained spreader lasts decades and delivers flawless results every time.
Tips & tricks for perfect lawn fertilizer application
These game-changing tricks will ensure your lawn gets that flawless, even coverage every time—no guesswork involved.
Calibration is Everything: In Step 1, when you mark that 10-foot section to test your spreader, don't just eyeball it—use a tape measure for precision. I've seen people estimate and end up with either patchy areas or over-application. The quarter-inch to half-inch per pass setting is your baseline, but every spreader behaves differently. If you're getting clumps, reduce the setting by 10% and test again. Remember, it's better to do two lighter passes than one heavy one that burns your grass.
Visualize Your Pattern: Before you even add fertilizer, walk your lawn in Step 2 with just the empty spreader. This dry run helps you visualize the parallel lines and spot any obstacles you might miss. I always sketch a quick diagram on paper—drawing helps me plan turns and account for corners. This simple step eliminates the "oops, I missed that spot" moments that ruin even coverage. Pro tip: Use sidewalk edges or driveway lines as your starting points—they create natural straight guides.
Pace Matters More Than You Think: During your perpendicular passes in Step 3, maintain that consistent, moderate pace by timing yourself over the 100-foot section. I've found that walking at about 3 miles per hour gives me perfect coverage with my spreader. Too fast and you'll see streaks, too slow and you'll create piles. If you notice uneven distribution after your second pass, adjust your speed rather than changing the setting—speed variations are easier to control than dial adjustments mid-application.
Watering Wisdom: When you water within 24 hours as directed in Step 4, split that 1-inch total into two sessions for maximum effectiveness. The first light application (about ¼ inch) activates the fertilizer immediately, while the deeper soak later gives nutrients time to penetrate. I set a timer for 4 hours between sessions to prevent overwatering. And here's a secret: if rain is forecast within 48 hours, skip the second watering—the natural rain will do the job without the risk of runoff.
Pro Tips for Use A Lawn Fertilizer Spreader
- These game-changing tricks will ensure your lawn gets that flawless, even coverage every time—no guesswork involved.
- Calibration is Everything: In Step 1, when you mark that 10-foot section to test your spreader, don't just eyeball it—use a tape measure for precision.
- Visualize Your Pattern: Before you even add fertilizer, walk your lawn in Step 2 with just the empty spreader.
Frequently asked questions
Got questions about using a lawn fertilizer spreader? You’re not alone!
Here are answers to the most common concerns—from timing to troubleshooting—to help you spread like a pro.
What’s the best time of year to fertilize my lawn?
The ideal time depends on your grass type and climate, but early spring (after the last frost) and late summer (before fall) are the most common. Cool-season grasses (like Kentucky bluegrass) thrive with spring and fall feedings, while warm-season grasses (like Bermuda) need summer fertilization. Always check your fertilizer’s label for specific guidelines!
How often should I fertilize my lawn?
Most lawns benefit from 3–4 applications per year, spaced 6–8 weeks apart. Over-fertilizing can burn grass or pollute water supplies, so follow the 3-1-1 rule: 3 times a year, 1 pound of nitrogen per 1,000 sq. ft., and 1 inch of water after spreading. Adjust based on soil tests and grass health!
Why is my spreader unevenly distributing fertilizer?
Uneven spread usually stems from clogged holes, incorrect settings, or speed inconsistencies. Start by cleaning the spreader’s holes with a wire or compressed air. Calibrate the spreader on a driveway or tarp to test coverage, and walk at a steady pace (about 3–5 mph for broadcast spreaders). For drop spreaders, overlap passes by 10–15% to avoid gaps.
Can I use a broadcast spreader for seed and fertilizer?
Yes, but not simultaneously! Broadcast spreaders work for both, but seeds and fertilizer have different weight and spread patterns. For seeds, use a lower setting and spread in two directions (like a crosshatch) for even coverage. Fertilizer can be applied before or after seeding, but avoid mixing them—it can smother seeds or clog the spreader.
Should I water my lawn after fertilizing?
Absolutely!
Watering lightly after spreading (about ¼ inch) helps activate the fertilizer and prevents it from blowing away. For granular fertilizers, apply a deeper watering (½–1 inch) 24–48 hours later to help nutrients reach the roots. Avoid heavy rain immediately after—it can wash fertilizer away before your grass absorbs it.
What’s the difference between a broadcast and drop spreader?
| Broadcast Spreader | Drop Spreader |
|---|---|
| Scatters fertilizer in all directions; faster for large areas. | Drops fertilizer directly below the spreader; more precise for edges. |
| Best for open lawns with no obstacles. | Ideal for landscaped areas, near sidewalks, or small patches. |
| Requires overlapping passes to avoid missed spots. | Allows controlled application along borders. |
Pro tip: Use both! Start with a broadcast spreader for the main lawn, then switch to a drop spreader for tricky edges.
Wrapping up and next steps
Mastering your lawn fertilizer spreader is the secret weapon for a lush, vibrant lawn that neighbors will envy! 🌱 By following the steps—calibrating, walking at a steady pace, and overlapping passes—you’ll ensure even coverage and healthier grass. Don’t forget to double-check your settings and safety gear before you start!
Now that you’re ready to tackle your lawn like a pro, grab your spreader and get to work! For extra tips, check out our guide on seasonal fertilization schedules to keep your lawn thriving year-round. Happy spreading! ✨