
Lawn
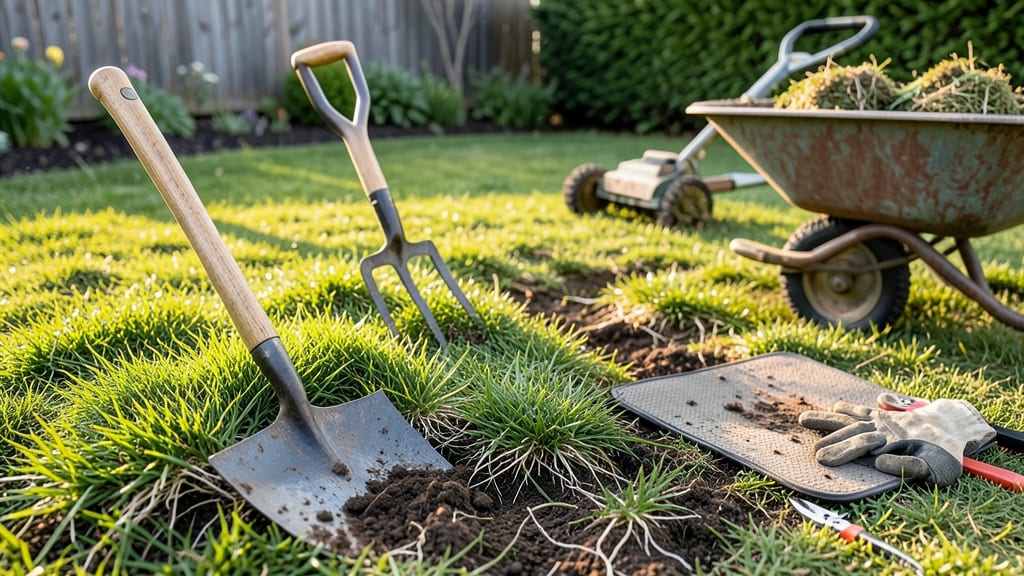
Digging up a lawn is harder than it looks—until you have the right tools. 🌱 I’ve torn up grass patches for new garden beds, and the difference between a frustrating afternoon and a smooth project comes down to your equipment.
A basic shovel won’t cut it when roots tangle like stubborn weeds, but the right combo of manual and powered tools makes the job manageable, even for beginners.
Start with a heavy-duty flat shovel (not a spade) for slicing through sod, and add a mattock for stubborn roots or rocky soil. For larger areas, a manual sod cutter (like a long-bladed knife on wheels) speeds up the work, while a rental sod cutter (gas-powered) handles acres in hours.
Don’t forget gloves—grass roots are sneaky, and blisters ruin the fun. The goal? Remove the entire sod sheet in one piece to avoid leaving behind root fragments that regrow.
Once the lawn’s gone, you’ll have a raw patch of soil ready for transformation. Test it for pH and nutrients, then amend with compost or topsoil before planting.
The right tools don’t just make digging easier—they turn a chore into a clean, efficient process that leaves your new garden bed ready for action. Think of it as an investment in your future harvests, not just a one-time headache.
Pro tip: Save the removed sod for mulch or compost—it breaks down into rich organic matter. And if you’re tackling uneven terrain, a hand tamper smooths the soil afterward, so your new plants don’t struggle with dips and bumps.
The key is working methodically, not brute-forcing it. Your back (and future garden) will thank you.
📚 In This Guide
- What you need
- Instructions
- Tips and common mistakes
- Wrapping up and next steps
What you need
- ● Heavy-duty shovel (D-handle) – 1 (16-20" blade, stainless steel or reinforced carbon steel for durability).
- ● Matlock or digging bar – 1 (3-4 ft long, sturdy wood or metal for prying roots).
- ● Garden fork – 1 (bifurcated, 18-24" tines, for breaking up compacted soil).
- ● Lawn edger or spade – 1 (for clean cuts around plants or obstacles).
- ● Wheelbarrow or sturdy tarp – 1 (for hauling debris; 3-4 cubic feet capacity recommended).
- ● Knee pads or gloves – 1 pair (heavy-duty gardening gloves with grip for protection).
- ● Post-hole digger – 1 (if tackling deep roots or stubborn patches).
- ● Soil knife or pruning saw – 1 (for trimming roots near structures or pipes).
- ● Rake (bow or leaf rake) – 1 (for leveling soil post-digging).
- ● Water hose with spray nozzle – 1 (to dampen soil and reduce dust).
- ● Safety goggles – 1 pair (to protect against flying debris).
- ● Check local regulations for buried utilities (call 811 in the U.S. before digging!).
- ● Mark any existing plants, sprinkler heads, or underground lines with flags.
- ● Wear long sleeves/pants to avoid scratches or thorns.
- ● Work on a dry day (wet soil sticks to tools and complicates digging).
Step-by-Step guide to digging up lawn with heavy-duty tools
Here's how to tackle lawn removal without backbreaking work—just the right tools and smart technique.
🪴 Step 1: Gather Your Heavy-Duty Toolkit
Start with a digging bar (also called a lawn fork) for leverage—it's your secret weapon for breaking up sod without bending over for hours. Pair it with a sharp spade for clean cuts and a pry bar to lift stubborn sections. Don't forget work gloves with reinforced palms to protect against jagged roots and blisters. I always add a wheelbarrow too; you'll thank me when you're hauling out sod chunks instead of dragging them.
Check your tools before starting. A dull spade makes work twice as hard, and a bent digging bar won't give you the leverage you need. Test the sharpness of your spade edge by running your thumb along it—it should glide smoothly without catching. If it feels rough, sharpen it now. For tough grass like Bermuda or Kentucky bluegrass, consider renting a sod cutter for the initial slice—it saves hours of backbreaking work.
✂️ Step 2: Mark and Cut the Lawn into Manageable Sections
Measure your lawn area and divide it into 2-3 foot wide strips using spray paint or a garden hose. This keeps you from getting overwhelmed and ensures you don't miss spots. Start at one edge and work toward the center. For straight lines, use a speed square or even a long board as a guide—it makes the cuts cleaner and easier to follow.
Run your sod cutter or spade along the marked lines to cut through the grass 1-2 inches deep. You want to sever the roots completely so they lift cleanly. If you're working without a sod cutter, angle the spade slightly to create a clean vertical cut. Press down firmly but don't force it—let the blade do the work. Stop every few feet to check your depth; roots vary in thickness, and you don't want to leave any behind.
💧 Step 3: Loosen and Lift the Sod in Sections
Insert the digging bar 1-2 inches into the soil at a 45-degree angle, just behind your cut line. Push down firmly with your foot on the bar's handle, then rock it back and forth to loosen the sod. You'll feel resistance as the roots break—this is where the bar earns its keep. Once the sod moves slightly, slide the spade under it and lift straight up.
Work in small sections, never trying to lift more than 2 square feet at once. Heavy sod tears easily, and you'll end up with messy chunks that take twice as long to remove. Drag each piece to your wheelbarrow immediately—don't stack them on the ground or you'll risk trampling new soil and creating a mess. If you hit a particularly stubborn root, use the pry bar to lever it up gently. Never yank or pull; this breaks the sod and makes cleanup harder.
🪴 Step 4: Remove Roots and Prepare the Soil
Once the sod is out, use the digging bar to scrape up any remaining roots and debris. Work the soil 4-6 inches deep to break up compacted layers—this is where your sod cutter or spade comes in handy again. For clay-heavy soil, a broadfork works better than a spade to loosen without turning the soil over completely. The goal is to create a loose, root-free bed for your new planting.
Rake the area smooth with a bow rake, removing all remaining grass fragments. If you're installing new sod or plants, this is your last chance to check for hidden roots or rocks. I always do a final sweep with a hand cultivator to catch anything the rake missed. For large areas, consider renting a rototiller—it speeds up this step dramatically, though it's overkill for small patches.
⏰ Step 5: Clean Up and Maintain Your Tools
Once the area is clear, load your sod into the wheelbarrow and haul it away for composting or disposal. Wet the bare soil lightly if you're not planting immediately—this prevents wind from blowing debris around and helps settle the ground. For large projects, take breaks every 30-45 minutes to stretch and hydrate. Lawn removal is physical work, and dehydration leads to fatigue faster than you'd expect.
After finishing, clean your tools immediately. Scrape off soil with the spade's back edge, then hose down metal parts to prevent rust. Store them in a dry place, and oil any moving parts on the digging bar or pry bar. Sharp tools last longer, so I always sharpen my spade after each use—it takes 5 minutes and saves hours of frustration later. Leave your gloves to air out in the sun; this kills bacteria and keeps them fresh for next time.
Tips & tricks for effortless lawn removal
Real talk: The right approach makes lawn removal feel like a breeze instead of a chore. Here's what I've learned from years of digging up stubborn grass patches without breaking a sweat.
Tool Prep is Non-Negotiable: Before you start, give your digging bar and spade a quick once-over. The 45-degree angle you use in Step 3 works best when the bar is straight and sturdy—no wobbles allowed. I've ruined two sod patches because I didn't notice my bar was bent until I was halfway through. Also, test your spade's sharpness by dragging it across your palm (gently!)—it should feel like a hot knife through butter, not sandpaper. A dull edge means extra effort and torn sod.
Section Size Matters: Those 2-3 foot wide strips in Step 2 aren't arbitrary—they're the perfect size for one-handed lifting. Any wider and you'll struggle to get leverage with your digging bar. Pro tip: Use a speed square to mark your lines, but if you don't have one, a long board works just as well. The key is keeping your cuts straight so you don't waste time on crooked sections later. Trust me on this: Messy cuts mean messy cleanup.
The 2-Square-Foot Rule: In Step 3, when you're lifting sod, remember this golden rule: never lift more than 2 square feet at once. I learned this the hard way after trying to yank up a 3x3 foot section that ended up tearing into four pieces. The wheelbarrow will thank you too—smaller pieces are easier to drag without compacting the soil underneath. For stubborn roots, use the pry bar like a lever, not a pry tool. Place it perpendicular to the root and push down gently until you hear a satisfying crack.
Soil Prep Shortcut: If you're working with clay-heavy soil (like I was in my backyard), swap the spade for a broadfork in Step 4. It loosens the soil without turning it over completely, which is exactly what you want for new planting. For large areas, rent a rototiller—it'll save you hours of backbreaking work, but only after you've removed all the sod. The 4-6 inch depth is crucial here; shallow loosening means roots will regrow faster than you'd like.
Pro Tips for Tools For Digging Up Lawn
- Real talk: The right approach makes lawn removal feel like a breeze instead of a chore.
- Tool Prep is Non-Negotiable: Before you start, give your digging bar and spade a quick once-over.
- Section Size Matters: Those 2-3 foot wide strips in Step 2 aren't arbitrary—they're the perfect size for one-handed lifting.
Frequently asked questions
Got questions about digging up your lawn? We’ve got answers!
Whether you're prepping for new landscaping, removing stubborn roots, or troubleshooting your tools, here are the most common queries—and their solutions.
What’s the best time of year to dig up a lawn?
The ideal window is early spring or fall when soil is moist but not frozen. Avoid summer heat (which dries out roots) or winter (when tools freeze and soil hardens). If you must dig in summer, water the area 24 hours beforehand to soften the ground.
Can I use a shovel alone, or do I need a full digging set?
A sturdy flat-edged shovel works for small patches, but for heavy-duty root removal or large areas, a combo tool set (with a mattock, pick, and digging bar) saves time and effort. Rentals are cost-effective for one-time projects. Pro tip: Pair your shovel with a lawn aerator first to loosen soil!
How do I remove roots without damaging underground pipes or cables?
First, call 811 (USA) to mark utility lines. Use a manual digging bar for precision—it glides under roots without brute force. For tight spaces, a handheld root saw or oscillating tool works like a scalpel. Always dig slowly and check depth frequently.
Why is my digging bar bending or breaking?
This usually means you’re hitting rocks or hardpan. Switch to a pickaxe for stubborn spots or rent a post-hole digger for rocky soil. If bending persists, check the material—alloy steel bars last longer than carbon steel. Sharpen dull edges and lubricate hinges regularly.
Are there eco-friendly alternatives to digging up my lawn?
Yes! Try sheet mulching (cardboard + compost) to smother grass naturally over months. For partial removal, use a sod cutter to lift intact sections, then replant or compost. Avoid chemical herbicides—they harm soil microbes. For roots, a manual root grater (like a heavy-duty rake) can break them down without digging.
Is renting tools cheaper than buying for a one-time project?
Yes!
Renting a heavy-duty set (e.g., from Home Depot or local tool rentals) costs $50–$100/day, while buying similar tools runs $200–$500+. Weigh your needs: Rent if it’s a one-off; buy if you’ll use tools yearly. Check for membership discounts (e.g., Home Depot’s Tool Rental Club).
Wrapping up and next steps
Choosing the right tools for digging up lawn can transform a daunting task into a manageable, even satisfying project! Whether you’re tackling stubborn roots or prepping for a new landscape, the right heavy-duty set—like shovels, mattocks, and root pry bars—makes all the difference. You’ve got this!
Now that you’re armed with the knowledge, grab your gear and get started. Pro tip: Work in small sections to avoid fatigue, and always wear gloves for comfort. Happy digging—your lawn’s transformation awaits! 🌱✨