
Lawn
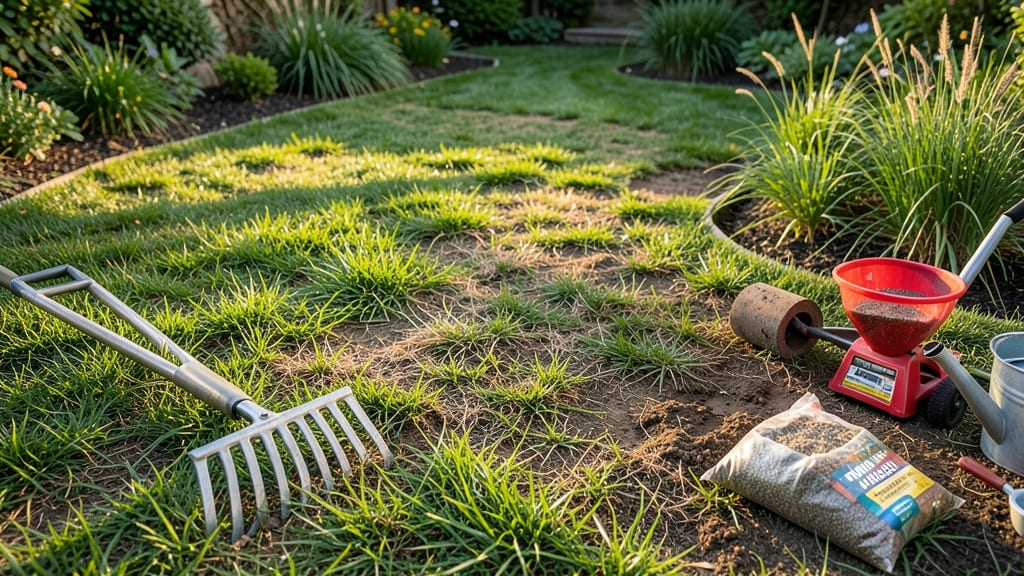
How to fix damaged lawn grass doesn’t have to be a guessing game—your yard can recover from footprints, drought, or pests in just 4-6 weeks without waiting for full regrowth. I’ve used the patch-and-grow technique to transform my family’s high-traffic yard from patchy to lush, and the secret lies in diagnosing the root cause before you fix it.
First, diagnose the damage: compacted soil, dead patches, or thinning grass all need different solutions. Compacted areas? Aerate first. Dead patches? Scrape out debris and test soil pH. Thinning?
Overseed in the right season. The goal is to create the perfect conditions for new grass to take hold—moisture, nutrients, and shade from the sun’s harshest hours.
With the right approach, you’ll see green shoots within 10-14 days and a fully recovered lawn by midsummer. The technique works for both cool-season and warm-season grasses, and it’s tough enough for high-traffic areas.
No more hiding the yard—just a thick, healthy carpet that holds up to play, pets, and weather.
Prevention is the real game-changer: adjust watering, fertilize seasonally, and address pests early. Once you’ve repaired the damage, these habits keep your lawn looking its best year-round. Let’s get started with the step-by-step process that actually works.
📚 In This Guide
- What you need
- Instructions
- Tips and common mistakes
- Wrapping up and next steps
What you need
- ● Lawn repair patches or plugs: 1–2 bags (depending on damage size; opt for eco-friendly, seed-infused options if possible).
- ● High-quality grass seed: 1–2 lbs (match the seed type to your existing lawn—cool-season or warm-season).
- ● Topsoil or compost: 1–2 cubic feet (screened, weed-free, and moistened for best results).
- ● Garden rake: 1 (with sturdy tines for loosening soil and removing debris).
- ● Hand shovel or spade: 1 (for digging out dead patches or aerating).
- ○ Lawn roller (optional but helpful): 1 (lightweight, 4–6 inches wide, for pressing seeds into soil).
- ● Watering can or hose with a gentle spray nozzle: 1 (for consistent moisture).
- ● Lawn fertilizer (slow-release, high in nitrogen): 1 small bag (follow package rates for damaged areas).
- ● Mulching fabric or straw: 1 small roll (to retain moisture and protect seeds from birds).
- ● Soil test kit: 1 (to check pH and nutrient levels before seeding).
- ● Lawn aerator (manual or rented): 1 (for deep soil loosening if compaction is severe).
- ● Pre-emergent herbicide: 1 small bottle (if weeds are a concern—apply after seeding!).
- ● Knee pads or gloves: 1 pair (for comfort during long sessions!).
- ● String trimmer or edger: 1 (to clean up edges after repairs).
Step-by-Step instructions for repairing a damaged lawn
This patch-and-grow method revives bare spots and thin areas in just weeks—no need for full reseeding.
Assess and Prepare the Damaged Areas
Walk your lawn to identify the extent of damage. Look for bare patches, yellowing grass, or areas where grass pulls up easily. Use a small shovel or spade to carefully remove dead grass, rocks, and debris from the damaged spots. This creates a clean, even surface for new growth. Aim to expose the soil about 1/2 inch deep—this ensures good seed-to-soil contact.
For larger damaged areas, mark the perimeter with a garden hose or string to visualize the repair zone. This helps you stay consistent when adding soil amendments. If the soil feels compacted or hard, loosen it lightly with a rake or cultivator. Compacted soil prevents roots from establishing properly, so breaking it up just enough to let air and moisture penetrate is key.
Add Soil Amendments for Optimal Growth
Spread a thin layer of compost or topsoil over the prepared areas to create a nutrient-rich bed for new grass. Use about 1/4 inch of compost—too much can smother seeds or seedlings. Work it gently into the loosened soil with a rake, ensuring it blends evenly without creating clumps. This step is critical for fast recovery, as healthy soil provides the foundation for strong root development.
If your lawn has persistent bare spots, consider adding a slow-release fertilizer designed for grass repair. Follow the package instructions for application rates, but avoid over-fertilizing, which can burn tender new growth. Water the amended areas lightly to help settle the soil and remove any dust. You’ll know it’s ready when the surface looks uniformly moist but not soggy.
Choose and Plant Grass Seed for Fast Recovery
Select a grass seed blend that matches your existing lawn type for a seamless look. For fast results, opt for a mix labeled for quick germination, often containing ryegrass or annual ryegrass. Sprinkle the seed evenly over the prepared areas, using about 1/2 pound per 100 square feet. A spreader makes this easier, but if you’re doing it by hand, lightly toss the seed so it covers the soil uniformly—no need to bury it.
Gently rake the seeded areas to press the seed into the soil lightly. This ensures good contact without burying it too deeply, which can delay germination. For larger patches, consider laying down a thin layer of straw or erosion control blanket to protect the seed from washing away during watering or rain. This step is especially important in windy or sloped areas where seed can easily blow or wash away.
Water and Maintain for Strong Establishment
Water the seeded areas immediately after planting, keeping the soil consistently moist for the first 2-3 weeks. Use a gentle spray or soaker hose to avoid dislodging the seed. Aim for about 1/4 inch of water daily, adjusting based on rainfall. Overwatering can suffocate seeds, while underwatering causes them to dry out and fail to sprout. You’ll know you’re doing it right when the soil stays damp but not waterlogged.
Once the new grass reaches about 2-3 inches tall, gradually reduce watering to encourage deeper root growth. Avoid walking on the repaired areas for at least 4-6 weeks to prevent damaging the delicate new roots. If weeds start to appear, pull them by hand before they compete with the grass for nutrients. With consistent care, your repaired lawn will blend seamlessly with the rest within 6-8 weeks.
Tips & tricks for perfect lawn recovery
These proven strategies will help you achieve a lush, restored lawn faster than you might expect—without the guesswork.
Soil Preparation Matters: In Step 1, when you're removing dead grass and debris, take an extra moment to check for thatch buildup—more than ½ inch can block water and nutrients. Use a thatch rake to loosen it before adding compost. This step is often overlooked but critical for ensuring your new grass gets the oxygen and moisture it needs to establish strong roots right from the start.
Compost Layer Technique: The ¼-inch layer of compost in Step 2 should be spread evenly and worked in just enough to create a crumbly texture. Think of it like mixing cake batter—you want it light and airy, not compacted. If your compost is coarse, sift it first for a finer, more consistent application. This small detail makes all the difference in how quickly your new grass takes hold.
Seed Placement Strategy: When you're sprinkling that ½ pound of seed per 100 square feet in Step 3, consider using a simple DIY trick: mix the seed with a small amount of sand first. This helps you distribute it more evenly and prevents clumping. For larger areas, a spreader is worth the investment—it ensures consistent coverage and saves you time. Uneven seed distribution is one of the most common reasons for patchy regrowth.
Watering Precision: That ¼-inch of water daily in Step 4 is crucial, but timing matters just as much as quantity. Water in the early morning to allow the soil to absorb moisture before the heat of the day. If you're using a sprinkler, check for even coverage—some areas might need slightly more if they're in full sun. Overhead watering can wash away seed, so a gentle soaker hose is ideal for the first few days after planting.
Pro Tips for Fix Damaged Lawn Grass
- These proven strategies will help you achieve a lush, restored lawn faster than you might expect—without the guesswork.
- Soil Preparation Matters: In Step 1, when you're removing dead grass and debris, take an extra moment to check for th...
- Compost Layer Technique: The ¼-inch layer of compost in Step 2 should be spread evenly and worked in just enough to c...
Frequently asked questions
How long does it take for damaged grass to recover after patching?
Recovery time depends on grass type and weather, but most patches show noticeable improvement in 2–4 weeks. Warm-season grasses (like Bermuda) recover faster in summer, while cool-season grasses (like Kentucky bluegrass) thrive in spring/fall. Be patient—full root establishment can take 3–6 months for a durable repair.
Can I overseed my lawn in the middle of summer?
Overseeding in peak summer (June–August) is not ideal—heat and drought stress young seedlings. Instead, aim for early fall (Sept–Oct) for cool-season grasses or late spring (April–May) for warm-season types. If you must overseed in summer, water daily and use shade cloth to protect tender sprouts.
What’s the best way to fix bare spots without reseeding?
For quick fixes, try sod patches (cut 2"x2" squares from healthy lawn edges) or grass plugs (small turf sections with roots). Water deeply 2x daily for the first week. For larger areas, apply a thick layer of compost and plant clover or creeping red fescue—they spread fast and tolerate foot traffic better than new seed.
Why is my patched grass turning yellow after a few weeks?
Yellowing often signals underwatering, overwatering, or poor soil contact. Check for:
- Watering issues: Grass needs 1–1.5" of water weekly (deep, infrequent soakings).
- Soil problems: Amend with compost if soil is compacted or nutrient-poor.
- Fungal disease: If yellow patches spread, treat with fungicide and improve airflow.
How often should I fertilize after repairing my lawn?
Wait 4–6 weeks after patching before fertilizing to avoid burning tender roots. Then, apply a slow-release, balanced fertilizer (10-10-10 or 20-0-5) in early spring or fall. For warm-season grasses, fertilize late spring. Always water before and after applying fertilizer to activate nutrients.
Wrapping up and next steps
A damaged lawn doesn’t have to stay that way! With the right tools, patience, and the patch-and-grow technique, you can restore your grass to lush, green perfection in no time.
Remember, consistency is key—whether you’re overseeding, patching bare spots, or adjusting your watering routine, small efforts add up to big results.
Ready to transform your lawn? Start with one small section today, and soon, you’ll be celebrating a vibrant outdoor space you can be proud of! 🌱