
Lawn
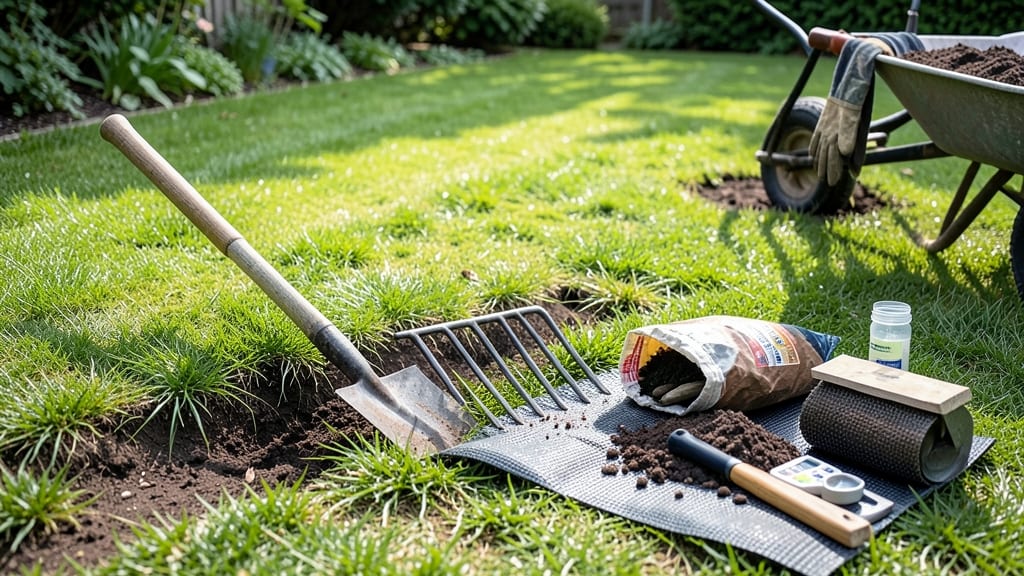
Preparing ground for lawn isn't just about clearing weeds—it's about creating the ideal foundation for grass to thrive. 🌱 I learned the hard way that skipping these steps leads to uneven growth, bare patches, and a lawn that never looks truly lush.
The secret lies in leveling the soil properly, amending it for drainage, and removing every obstacle before seeding or laying sod.
You'll need basic tools: a shovel, rake, lawn roller, soil test kit, and compost or fertilizer. Start by removing all rocks, roots, and debris, then till the soil to a depth of 4-6 inches.
This breaks up compacted layers so roots can penetrate easily. A soil test reveals what nutrients your yard needs—most lawns benefit from compost or a balanced starter fertilizer.
The payoff comes when you spread seed or sod over perfectly prepped ground. Grass establishes faster, stays green longer, and resists weeds better. Think of it as building a house: skip the foundation work, and you'll deal with cracks and uneven floors later.
With the right prep, your lawn will look professional-quality from day one.
Works for new lawns, patchy areas, or even renovating an old yard. The key is patience—rushing leads to thin spots and extra work later. Here's how to do it right the first time, without the guesswork.
📚 In This Guide
- What you need
- Instructions
- Tips and common mistakes
- Wrapping up and next steps
What you need
- ● Shovel or Spade: A sturdy flat-blade shovel (18–24 inches long) for digging and moving soil.
- ● Rake: Bow rake (for leveling soil and removing debris, 18–24 inches wide).
- ○ Leaf rake (optional, for clearing thick layers of leaves or thatch).
- ● Garden Hoe: A stirrup hoe (for weeding and breaking up compacted soil).
- ● Wheelbarrow or Bucket: 5-gallon capacity for hauling soil, rocks, or compost (1–2 units).
- ● Soil Amendments: Compost (2–3 inches spread evenly, improves soil fertility).
- ● Topsoil (if needed, 2–4 inches for poor or rocky soil).
- ○ Leveling Tools: Laser level or transit level (for precise grading, optional but helpful for large areas).
- ● 2x4 board or straightedge (DIY alternative for checking slopes).
- ● String Line & Stakes: 100-foot nylon line and wooden stakes (for marking grade lines).
- ● Knee Pads or Work Gloves: Heavy-duty gardening gloves (to protect hands from rocks and debris).
- ● Soil Testing Kit (to check pH and nutrient levels before amending).
- ● Tiller or Rototiller (for breaking up tough, compacted soil in large areas).
- ● Landscape Fabric (to suppress weeds before laying sod or seeding).
- ● Sand or Gravel (for adjusting drainage in clay-heavy soil).
- ● Post-Hole Digger (if installing edging or border stakes).
Step-by-Step guide to leveling soil for a perfect lawn
Here's how I transform uneven ground into a smooth, grass-friendly base—no shortcuts, just a flawless foundation.
🪴 Step 1: Clear and Mark the Area
Start by removing all debris, rocks, and weeds from the space—even small pebbles will poke through new sod or seed. I like to use a metal rake to drag everything into a central pile, then haul it away. Mark the lawn edges with wooden stakes and string to create a clean boundary; this prevents over-digging and keeps the area neat.
For larger areas, I borrow a garden hose to outline the perimeter—water marks the soil perfectly. Pay attention to slopes: if your yard has noticeable inclines, you'll need to address those next. The goal is to have a clearly defined space where you can visualize the finished lawn.
🌱 Step 2: Loosen and Level the Soil
Rent or borrow a tiller to break up the top 6-8 inches of soil. This helps roots penetrate deeply and prevents compaction. I work in small sections, about 4 feet wide, to maintain control. After tilling, use a rake to smooth the surface—you're aiming for a texture like fine sand, with no clumps or holes larger than 1 inch in diameter.
For stubborn low spots, add a mix of topsoil and compost (about 2-3 inches total) and blend it in. High spots can be reduced with a shovel or mattock, but avoid creating sharp edges. Run a 2x4 board across the area to check for levelness—if it wobbles, you've still got work to do. This step is where perfection begins.
☀️ Step 3: Compact and Prepare for Grass
Once the soil is smooth, rent a plate compactor or use a lawn roller to firm the surface. This step is critical—it prevents future settling and creates a stable base for seed or sod. Walk over the area in a grid pattern, overlapping each pass by 6 inches to ensure even compaction. The soil should feel firm but not rock-hard; you should be able to press your thumb in about ½ inch without resistance.
For extra stability, especially in clay-heavy soil, I spread a ¼-inch layer of sand over the compacted area and lightly rake it in. This improves drainage without altering the levelness you've just achieved. Now's also the time to test your soil pH—most grasses thrive in a range of 6.0-7.0. If yours is off, you'll need to amend it before planting.
⏰ Step 4: Final Level Check and Edging
Before adding grass, do one last level check. Place a 4-foot level across the area in multiple directions—north to south, east to west, and diagonally. Adjust any high or low spots with small amounts of soil or sand, then re-compact. I like to use a laser level for larger lawns; it takes the guesswork out of perfect flatness.
Finish by edging the lawn with a half-moon edger or spade to create clean lines. This prevents grass from creeping into flower beds or sidewalks later. For a polished look, I run a stiff broom over the surface to remove any remaining debris. Now your ground is ready for seed, sod, or even ground cover—all you need is the grass itself.
Tips & tricks for perfect lawn ground preparation
Here's what nobody tells you about creating that flawless foundation for your dream lawn.
The Tilling Technique: When you're tilling that 6-8 inch layer in Step 2, work in overlapping strips about 4 feet wide—this prevents missed spots where grass roots might struggle later. I like to go back over the edges after the first pass to ensure complete coverage. The goal is to break up all those compacted layers without creating big clumps. If you hit a stubborn root or rock, stop and remove it by hand rather than forcing the tiller—it'll save you headaches down the road.
Leveling Like a Pro: That 2x4 board trick in Step 2 is your new best friend, but here's the secret: drag it slowly across the soil in both directions. If it wobbles more than ¼ inch in either direction, you've still got work to do. For really large areas, consider renting a laser level—it takes the guesswork out of perfect flatness and helps you visualize the final grade before you even start planting. The difference between a "good enough" lawn and a showstopper often comes down to this single step.
Compaction Confidence: When you're walking over the soil in a grid pattern with your plate compactor in Step 3, think of it like rolling out pie dough—consistent pressure matters. That 6-inch overlap between passes ensures even compaction, but don't rush it. The soil should feel firm enough that your thumb leaves only a ½-inch dent when pressed. If it feels too soft, you'll get settling later when the grass starts growing. For clay-heavy soil, that optional ¼-inch sand layer works wonders for drainage without ruining your level work.
Final Check Essentials: Before you call it done in Step 4, do this: walk across your freshly leveled area. If you feel any bumps or dips through your shoes, you missed something. That final level check with the 4-foot level should show perfect alignment in all directions. Pro tip: Check your level against a perfectly horizontal surface like your car's hood or a countertop to ensure accuracy. And that stiff broom sweep at the end isn't just for looks—it removes those last bits of debris that could block grass growth.
Pro Tips for Prepare Ground For Lawn
- Here's what nobody tells you about creating that flawless foundation for your dream lawn.
- The Tilling Technique: When you're tilling that 6-8 inch layer in Step 2, work in overlapping strips about 4 feet wide—this prevents missed spots where grass roots might struggle later.
- Leveling Like a Pro: That 2x4 board trick in Step 2 is your new best friend, but here's the secret: drag it slowly across the soil in both directions.
Frequently asked questions
Got questions about prepping your lawn? You’re not alone! Here are some of the most common concerns—and their straightforward solutions—to help you get started with confidence.
How long does it take to prepare ground for a lawn?
Prepping your soil can take anywhere from a few hours to a full weekend, depending on the size of your yard and how much work is needed. Clearing debris and marking areas is quick, but tilling, leveling, and amending soil (like adding compost or sand) may require more time. Break it into manageable steps to avoid burnout!
What’s the best time of year to prepare soil for a lawn?
The ideal time is early spring or early fall when the ground is workable but not frozen or waterlogged. Spring prep lets you plant grass seed by late spring, while fall prep gives roots time to establish before winter. Avoid extreme heat or heavy rain, which can disrupt your progress.
Can I skip tilling and still get a good lawn?
You can, but tilling helps loosen compacted soil, improve drainage, and mix in amendments like compost or sand. If your soil is already loose and fertile, you might skip tilling—but consider aerating instead. For clay-heavy or rocky soil, tilling is highly recommended to create the right foundation for grass roots.
What if my yard isn’t perfectly level? Can I still have a nice lawn?
While leveling is ideal, small slopes or uneven areas can still support a lawn. Focus on gradual slopes (no steeper than 1:20) to prevent erosion. For bigger issues, consider terracing or retaining walls to manage water runoff. Just avoid puddles—grass needs good drainage to thrive.
What do I do if weeds keep coming back after I prepare the soil?
Weeds are tough but not unbeatable! Start with a pre-emergent herbicide before seeding, then use post-emergent treatments for existing weeds. After your lawn establishes (about 3–4 weeks), regular mowing and overseeding will crowd out weeds naturally. For stubborn patches, hand-pull or spot-treat as needed.
Wrapping up and next steps
Preparing your ground for a lawn is all about patience, precision, and a little elbow grease—but the results are totally worth it! By leveling the soil, removing debris, and ensuring proper drainage, you’re setting the stage for a lush, healthy lawn that’ll be the envy of the neighborhood. 🌱
Now that you’re armed with the right tools and techniques, it’s time to roll up your sleeves and get started. Take it step by step, and before you know it, you’ll be enjoying a perfectly manicured lawn that’s as inviting as it is beautiful. Happy digging!