
Lawn
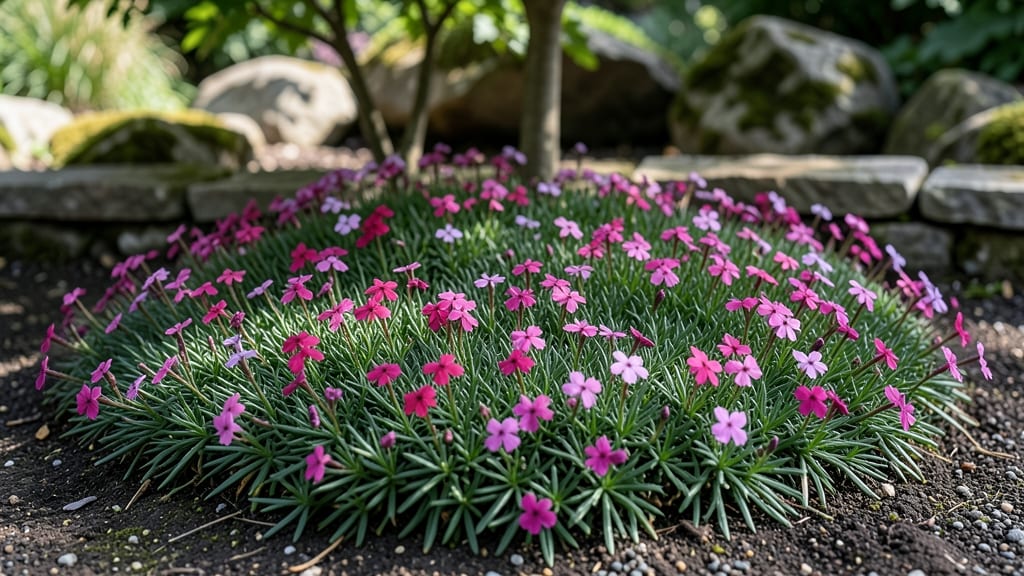
A creeping phlox lawn transforms your yard into a fragrant, ever-changing carpet of color—no mowing required. 🌸 I swapped my high-maintenance grass for this ground cover, and now my front yard bursts with purple, pink, and white blooms from spring through summer, while the foliage stays lush all season long.
The best part? It thrives where grass struggles—dry spells, partial shade, and rocky soil. Plant it in 3-inch-deep beds with well-draining soil, and you’ll spend far less time weeding and watering than with traditional lawns. Just a light trim after blooming keeps it tidy.
Imagine stepping onto soft, velvety foliage that smells like spring every time you walk by. The flowers attract pollinators, and the dense mat chokes out weeds naturally. It’s the kind of lawn that makes neighbors stop to ask, “What is that?”
Perfect for slopes, borders, or even replacing tired grass patches. With minimal care, you’ll have a living carpet that’s drought-tolerant, pest-resistant, and stunning year-round. Let’s get yours planted!
📚 In This Guide
- What you need
- Instructions
- Tips and common mistakes
- Wrapping up and next steps
What you need
- ● Creeping phlox plants: 12–15 plants per 100 sq. ft. (choose Phlox subulata varieties like 'Sherwood Purple' or 'Emerald Blue' for best coverage).
- ● High-quality topsoil: 2–3 inches, amended with compost (1 part compost to 3 parts soil).
- ● Organic mulch: 1–2 inches of shredded bark or pine needles to retain moisture.
- ● Slow-release fertilizer: 10-10-10 or a low-phosphorus blend (e.g., Espoma Organic Plant Food).
- ● Drip irrigation or soaker hoses: For consistent moisture (especially in dry climates).
- ● Garden gloves: Heavy-duty to protect hands during planting.
- ● Garden trowel or spade: For digging small holes (6" deep).
- ● Rake: Metal or plastic to level soil and remove debris.
- ○ Wheelbarrow: For hauling soil and mulch (optional but helpful!).
- ● String & stakes: To mark planting patterns (if desired).
- ● Epsom salt: 1 tbsp per plant annually for magnesium boost.
- ● Landscape fabric: To suppress weeds before planting.
- ● Pruning shears: For shaping after the first bloom cycle.
- ● pH test kit: To ensure soil pH is 6.0–7.0 (creeping phlox prefers slightly acidic to neutral).
Step-by-step guide to planting a lush creeping phlox lawn
Here’s how to create a vibrant, low-maintenance ground cover that blooms all season long.
🌱 Step 1: Prepare the Soil for Optimal Growth
Creeping phlox thrives in well-draining soil with a slightly acidic to neutral pH (6.0–7.0). Work the top 6 inches of soil to loosen it, removing any weeds or debris. If your soil is heavy clay, mix in 2–3 inches of compost to improve drainage and fertility.
Spread a 2-inch layer of mulch (like shredded bark or pine straw) after planting to retain moisture and suppress weeds. Avoid piling mulch directly against the stems—keep it 2 inches away to prevent rot. The soil should feel crumbly and moist, not compacted or waterlogged.
☀️ Step 2: Choose the Right Planting Location
Creeping phlox adapts to both sun and shade but performs best in partial shade to full sun (4–6 hours of sunlight daily). In hot climates, afternoon shade prevents leaf scorch. Test your spot by observing how sunlight moves across it throughout the day.
For a seamless lawn effect, plant in staggered rows 12–18 inches apart, allowing the mats to fill in naturally. If planting in existing grass, mark planting lines with string and stakes, then carefully remove grass in a 4-inch-wide strip along each line using a sod cutter or spade.
🌿 Step 3: Plant and Water for Strong Establishment
Dig holes twice as wide as the root ball but no deeper. Gently remove plants from their containers, loosening tangled roots if needed. Place each plant so the top of the root ball sits level with the surrounding soil—burying too deep can cause rot.
Water deeply right after planting to settle the soil and eliminate air pockets. Keep the area consistently moist (not soggy) for the first 2–3 weeks1 inch below the surface.
✂️ Step 4: Maintain for Year-Round Beauty
Once established, creeping phlox needs minimal care. Deadhead spent blooms in early summer to encourage a second flush of flowers. In late fall, trim back any browned foliage but leave the base growth intact—it protects the plant through winter.
Fertilize lightly in early spring with a balanced, slow-release fertilizer (10-10-10). Avoid high-nitrogen feeds, which promote leafy growth at the expense of blooms. If weeds become an issue, hand-pull them early in the season before they compete with your phlox.
⏰ Step 5: Divide and Expand Over Time
Every 3–4 years, divide mature clumps in early spring to rejuvenate growth. Dig up a section with a sharp spade, then separate into smaller pieces with clean hands or a knife. Replant divisions immediately in prepared soil, watering well to help them re-establish.
This is the secret to keeping your phlox lawn lush—dividing prevents overcrowding and ensures vibrant blooms. Watch for new shoots at the edges of existing plants; these are your free expansion points. With patience, your creeping phlox will spread into a dense, flower-filled carpet.
Tips & tricks for perfect creeping phlox ground cover
Here's what nobody tells you about making your creeping phlox spread like a dream—without the guesswork.
Soil Test First: Before you dig that 6-inch-deep hole, grab a soil test kit from your local garden center. Creeping phlox loves that slightly acidic to neutral pH (6.0–7.0), but many soils need adjustments. If yours tests high, work in sulfur or peat moss—just follow package instructions. I learned this the hard way after watching my first batch struggle in alkaline soil.
Sunlight Mapping: That 4–6 hours of sunlight recommendation is critical, but here's the secret: use a sunlight tracker app for a week first. Trace where shadows fall at different times of day. Hot afternoon sun can scorch leaves, so if you're in a southern climate, prioritize morning sun with afternoon shade. I mapped my garden and moved half my phlox to a more shaded spot—now they bloom twice as long.
Mulch Like a Pro: That 2-inch layer of mulch isn't just decoration—it's insurance. For the first year, check moisture weekly by poking your finger 1 inch down. If it's dry, water deeply. Pro tip: Use pine straw in southern climates—it mimics natural forest conditions and resists compaction better than bark mulch. Just keep it 2 inches away from stems to prevent rot, as the instructions say.
Divide at the Right Time: Those 3–4 year divisions should happen in early spring when new shoots appear. Here's what I do: dig up a section, rinse off the roots gently, then separate with clean hands. The key is to replant divisions immediately—they establish faster. I've found that dividing every 3 years gives me the most vibrant blooms, not the full 4 years.
Pro Tips for Creeping Phlox Lawn
- Here's what nobody tells you about making your creeping phlox spread like a dream—without the guesswork.
- Soil Test First: Before you dig that 6-inch-deep hole, grab a soil test kit from your local garden center.
- Sunlight Mapping: That 4–6 hours of sunlight recommendation is critical, but here's the secret: use a sunlight tracker app for a week first.
Frequently asked questions
Got questions about creating a stunning creeping phlox lawn? You’re not alone! Here are answers to the most common inquiries to help you get started with confidence.
Is creeping phlox a good alternative to traditional grass?
Creeping phlox is a low-maintenance, drought-tolerant ground cover that thrives in sun or partial shade—unlike grass, which needs frequent mowing and watering. It also suppresses weeds naturally and stays lush with minimal effort. Perfect for eco-friendly lawns or high-traffic areas!
How long does it take for creeping phlox to establish and fill in?
Patience pays off! With proper care, creeping phlox typically fills in gaps within 1–2 growing seasons. For faster results, plant plugs or sod sheets instead of seeds. Mulch lightly to retain moisture and reduce competition from weeds until it’s fully established.
Can creeping phlox handle full sun or shade?
Yes! While it prefers full sun to partial shade, creeping phlox is adaptable. In hot climates, afternoon shade helps prevent wilting. For shady spots, choose varieties like Phlox subulata ‘Mound of Pink’, which tolerates lower light better than others.
What pests or diseases should I watch for with creeping phlox?
Creeping phlox is generally pest-resistant, but keep an eye out for aphids, slugs, or powdery mildew in humid conditions. Improve airflow by spacing plants 6–12 inches apart, and water at the base (not overhead) to prevent fungal issues. Aphids can be sprayed off with water or treated with neem oil.
How do I keep creeping phlox from spreading into unwanted areas?
Creeping phlox spreads via runners, so contain it with edging or barriers (like landscape fabric or metal edging) if needed. Regular trimming also helps control its growth. For a neater look, shear back in early spring before new growth emerges.
Wrapping up and next steps
Transforming your lawn with creeping phlox is a rewarding way to add vibrant color and low-maintenance beauty to your outdoor space. Whether you're embracing its sun-loving charm or discovering its adaptability in partial shade, this ground cover delivers year-round appeal with minimal effort.
Ready to bloom with confidence? Start small—plant a test patch this spring or fall, then expand as you fall in love with its resilience and charm! 🌸