
Lawn
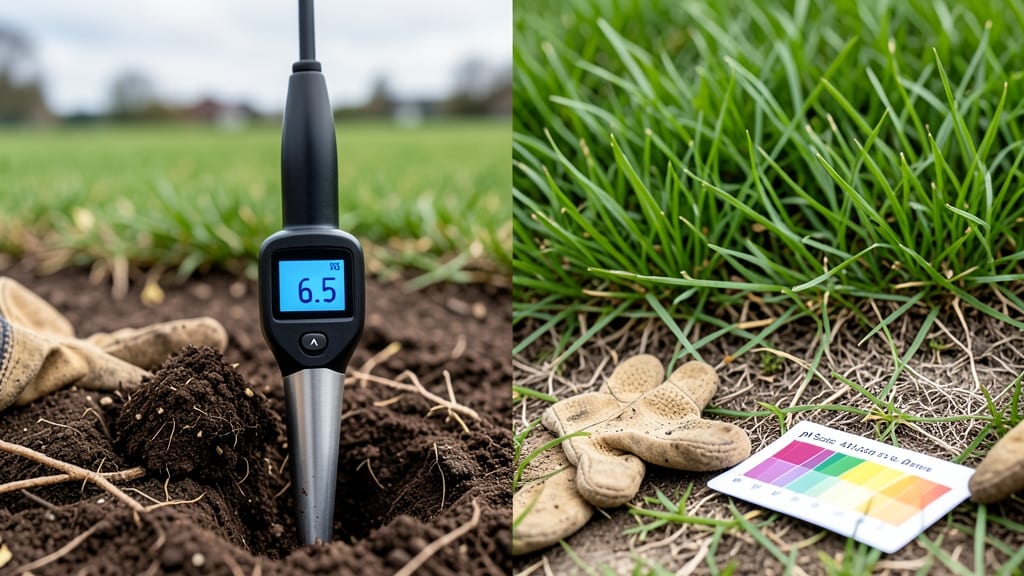
A lawn soil pH tester is your secret weapon against patchy grass and stubborn weeds. 🌱 I spent years guessing what my lawn needed—until I realized most problems start with the soil. The right pH means the difference between lush green grass and a struggling lawn that never quite thrives.
Testing is simpler than you think: just collect samples, dip the tester, and read the color. My first test revealed my soil was too acidic—explaining why clover took over. Within weeks of adjusting, my grass turned vibrant again. The tester costs pennies compared to what you’ll save on failed treatments.
You’ll spot exactly what’s wrong: yellowing grass? Likely too acidic. Stunted growth? Probably alkaline. Each reading tells you whether lime, sulfur, or organic matter will fix the problem. No more guessing—just science-backed solutions. This isn’t just about fixing issues—it’s about perfect lawn care.
Once you master the tester, you’ll adjust pH like a pro, keeping your grass healthy season after season. Let’s get those readings right!
📚 In This Guide
- What you need
- Instructions
- Tips and common mistakes
- Wrapping up and next steps
What you need
- ● Lawn soil pH tester kit – Choose a digital or test strip kit (e.g., blank">Bluelab Soil pH Meter or blank">Luster Leaf Rapid Test Kit). Digital meters offer instant readings, while test strips are budget-friendly.
- ● Garden trowel or soil sampler – A stainless-steel trowel (6–8 inches long) for collecting deep soil samples (avoid plastic to prevent contamination).
- ● Clean 500mL plastic or glass container – For storing soil samples before testing. No soap residue!
- ● Distilled water – 1 cup (8 oz) per test (tap water may skew results due to mineral content).
- ● Plastic gloves – To keep samples clean and avoid cross-contamination.
- ● Notebook & pen – To record pH levels, soil type, and amendments used.
- ● Soil pH adjustment products – Lime (to raise pH) or sulfur (to lower pH) if you plan to amend soil immediately.
- ● pH calibration solution – For digital meters (check your tester’s manual for compatibility).
- ● Small sieve (¼-inch mesh) – To remove rocks/debris from soil samples for more accurate readings.
- ● Portable lab or test kit stand – Keeps test strips/meter steady for precise results.
Step-by-step guide to accurate lawn soil pH testing
Get your soil's pH dialed in for lush, healthy grass—this is how I do it right every time.
📏 Step 1: Collect Representative Soil Samples
Grab a clean trowel and dig 4-6 small samples from your lawn, about 2-3 inches deep. Space them evenly—take one from each corner and a couple from the middle. Avoid areas with fresh grass clippings or thatch, as these can skew results. I like to use a plastic bag or clean bucket for collection.
Mix all the samples together thoroughly. You want a composite that truly represents your entire lawn's soil chemistry. If you have distinct areas with different grass health, test them separately. For example, if one section is always brown while others stay green, test that spot alone to pinpoint the issue.
🧪 Step 2: Prepare the Soil Sample for Testing
Spread the mixed soil on a clean sheet of newspaper or paper towel to dry completely. This usually takes 24-48 hours, depending on humidity. Once dry, break it into small clumps with your fingers—no need to grind it into powder. The goal is to remove excess moisture without altering the soil structure.
Sift out any large debris like twigs, rocks, or roots. These don't affect pH but can interfere with accurate readings. If you're using a digital tester, you'll need about 1 cup of prepared soil. For liquid test kits, follow the specific instructions for sample size—usually 2-3 tablespoons. I always label my samples with the date and location to avoid confusion later.
📊 Step 3: Calibrate Your pH Tester Properly
Before testing, check your meter's calibration. Most testers include calibration solutions—start with the pH 7.0 solution (neutral). Dip the probe into the solution and wait 30-60 seconds for the reading to stabilize. If it doesn't show 7.0 ±0.2, recalibrate using the adjustment screw or follow your manual's instructions. This step is critical—an uncalibrated meter gives false readings that lead to wasted time and money.
Once calibrated, rinse the probe with distilled water and gently pat it dry with a lint-free cloth. Never use tap water or paper towels, as minerals or fibers can contaminate the probe. For digital meters, some require a second calibration with a pH 4.0 or 10.0 solution—check your manual. I always recalibrate between batches of samples to maintain accuracy.
⚖️ Step 4: Take the pH Reading
Place the prepared soil into your tester's sample holder or follow the kit's instructions for direct soil contact. For digital meters, insert the probe into the soil until fully submerged. Wait 2-3 minutes for the reading to stabilize—don't rush it. The display should show a steady number between 4.0 and 8.0 for lawn soils.
If you're using color-comparison test kits, follow the directions to mix the soil with the provided reagent. Compare the resulting color to the chart immediately—colors fade quickly. I've found that taking multiple readings from different spots in the same sample can confirm consistency. Record each reading and average them for your final pH value.
📝 Step 5: Interpret Results and Plan Amendments
Most grasses thrive in slightly acidic to neutral soil, typically between 6.0 and 7.0. If your reading is below 6.0, your soil is too acidic—lime will raise the pH. For readings above 7.0, sulfur or peat moss will lower it. I always check my local extension service's recommendations, as regional soil types vary.
Don't panic if your pH is outside the ideal range—most soils can be adjusted with proper amendments. For example, a 5.5 pH might only need a light application of dolomitic lime in spring. Test again in 2-3 months to monitor progress. I keep a simple logbook with dates, pH readings, and amendments applied—it helps track long-term soil health.
Tips & tricks for perfect lawn soil pH testing
Precision starts with preparation—these small details make all the difference in your soil test results.
Sampling Strategy: I can't stress enough how important it is to take those 4-6 samples from different spots. I once tested a lawn where one corner was always brown, and sure enough, that spot had a 5.2 pH while the rest was 6.8. Always test problem areas separately to diagnose the real issue. This targeted approach saves you from treating the whole lawn unnecessarily.
Drying Time Tip: Those 24-48 hours of drying might feel like forever, but rushing it leads to inaccurate readings. I learned this the hard way when my first test came back 0.5 points off because the soil was still damp. Use a fan in humid climates to speed things up safely—just don't overdo it or you'll alter the soil structure.
Calibration Confidence: The 30-60 seconds waiting period during calibration is non-negotiable. I've seen meters jump from 7.0 to 6.8 in just 10 seconds before stabilizing. Keep the probe fully submerged and avoid touching the sides of the container. For digital meters, some require that second calibration with pH 4.0 or 10.0 solutions—always double-check your manual before skipping this step.
Reading Consistency: When taking your 2-3 minute reading, I recommend stirring the soil sample gently between measurements. This ensures you're getting an average reading rather than hitting a particularly alkaline or acidic pocket. For color-comparison kits, work quickly—the colors can fade in as little as 30 seconds, throwing off your results.
Pro Tips for Lawn Soil Ph Tester
- Precision starts with preparation—these small details make all the difference in your soil test results.
- Sampling Strategy: I can't stress enough how important it is to take those 4-6 samples from different spots. I once t...
- Drying Time Tip: Those 24-48 hours of drying might feel like forever, but rushing it leads to inaccurate readings. I ...
Frequently asked questions
Got questions about using a lawn soil pH tester? You’re not alone!
Here are answers to the most common concerns—from calibration to troubleshooting—to help you get accurate readings every time.
What’s the ideal pH range for a healthy lawn?
The sweet spot for most lawn grasses is 6.0 to 7.0. Cool-season grasses (like fescue or Kentucky bluegrass) thrive slightly acidic (6.0–6.5), while warm-season grasses (like Bermuda or Zoysia) prefer 6.5–7.5. Test your soil to adjust with lime (to raise pH) or sulfur (to lower it).
How often should I test my lawn’s soil pH?
Check your soil once a year as a general rule, but test more often if you’ve recently amended the soil, applied fertilizer, or noticed poor grass growth. Seasonal changes (like heavy rain or drought) can also shift pH, so spring or fall are ideal times for testing.
Can I use a pH tester on wet soil?
Nope! Wet soil can skew results by diluting the sample or altering the chemical balance. Always test dry soil—dig a small hole, collect a sample, and let it air-dry for 24 hours before testing. For quick checks, use a handheld tester on moistened (not soaking) soil, but follow the manufacturer’s guidelines.
Are digital pH testers more accurate than liquid test kits?
Both have pros! Digital testers give instant, precise readings (great for calibration) but require maintenance (like cleaning probes). Liquid test kits (mail-in or DIY) are budget-friendly and less tech-dependent but take longer. For most homeowners, a combo of both—digital for regular checks and a kit for annual deep analysis—works best.
Why does my pH tester keep giving inconsistent readings?
Inconsistent readings often mean calibration issues, dirty probes, or improper soil prep. Try these fixes:
- Calibrate your tester using a known pH buffer solution (usually pH 4.0 and 7.0).
- Clean probes with distilled water and vinegar (1:1 ratio) if readings drift.
- Test multiple spots—pH varies across lawns! Take samples from shady, sunny, and high-traffic areas.
- Replace batteries or probes if the tester is older than 2–3 years.
Wrapping up and next steps
Testing your lawn’s soil pH doesn’t have to be complicated—with the right lawn soil pH tester and a little precision, you’ll unlock the secret to lush, vibrant grass all season long. 🌱 Whether you’re adjusting for acidic or alkaline soil, every small tweak makes a big difference in root health and growth.
Now that you’re equipped with the knowledge, grab your tester and get ready to transform your yard into a thriving green oasis!
🔹 Next Step: Start testing your soil today and make those data-driven adjustments—your lawn will thank you!