
Lawn
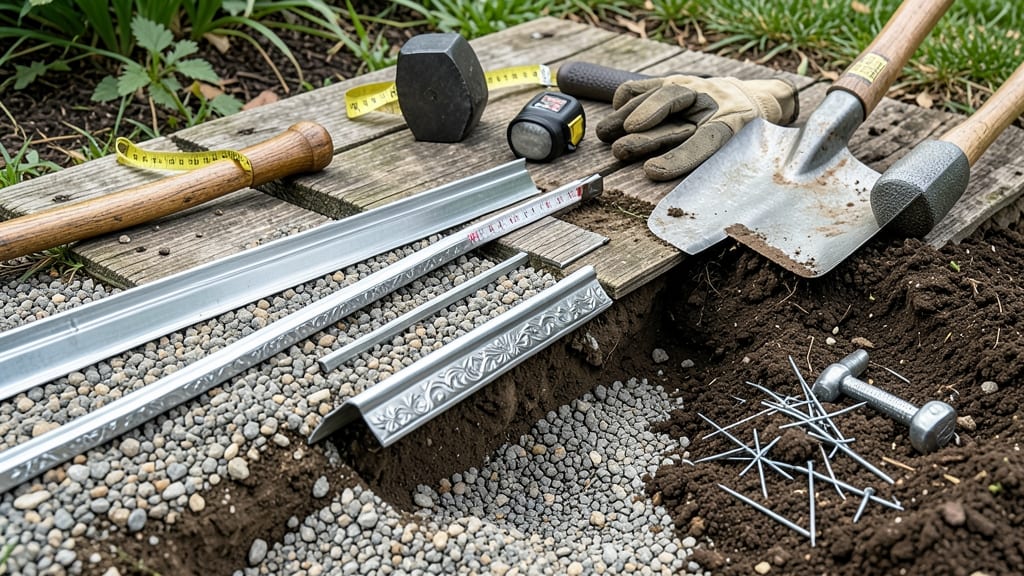
Metal lawn edging transforms your yard from a messy blur to a crisp, professional landscape that lasts decades without fading or cracking. 🌿 I’ve seen cheap plastic edging curl and rot within a few years, but metal stays sharp and sturdy—even after heavy rain or seasonal shifts.
The right piece defines paths, protects flower beds, and makes mowing effortless by keeping grass where it belongs.
Your options aren’t just one-size-fits-all: aluminum bends easily for curves and decorative shapes, while steel offers heavy-duty strength for high-traffic areas. I prefer aluminum for garden borders because it’s lightweight yet durable, and it won’t rust like iron.
Think of it as the invisible framework that holds your design together—whether you’re outlining a winding path or framing a vegetable patch.
Installation takes under an hour for a small bed, and the results are instant: no more grass creeping into mulch or weeds taking over the edges. The clean lines make your garden look intentional, even if the rest is still a work in progress.
Plus, metal edging stays put through freeze-thaw cycles, unlike plastic or wood that warps over time.
For creative touches, try angled edges to add depth or interlocking sections for a seamless look. Pair it with stone mulch for a modern vibe or gravel for a rustic feel.
The key is matching the material to your yard’s needs—durability for high-traffic spots, flexibility for curves, and a finish that complements your home’s style.
📚 In This Guide
- What you need
- Instructions
- Tips and common mistakes
- Wrapping up and next steps
What you need
- ● Metal lawn edging: Z-shaped or L-shaped aluminum/steel edging (choose galvanized or vinyl-coated for longevity).
- ● Pro Tip: Measure your lawn’s perimeter first! For a 100-foot border, plan for ~10% extra for cuts/waste.
- ● Shovel or spade: For digging trenches (6–8" deep, 4–6" wide).
- ● Measuring tape & stakes: To mark layout lines accurately.
- ● String line or garden hose: For straight, level guides.
- ● Rubber mallet or sledgehammer: To gently tap edging into place.
- ○ Post-hole digger (optional but helpful): For rocky soil or tight corners.
- ● Garden gloves & safety goggles: Because protection is non-negotiable! 🛡️
- ● Concrete mix or gravel: To secure edging in loose soil.
- ● Level: For ultra-straight installations.
- ● Staple gun (for vinyl-coated edging): To attach caps or connectors.
- ● Paint or powder coating: Customize colors to match your landscape.
- ● Clear the work area of rocks, debris, and weeds.
- ● Check local regulations—some areas require permits for permanent installations.
- ● Pick a dry day for digging (wet soil = messy trenches!).
Step-by-step guide to installing metal lawn edging
Metal edging creates clean, permanent borders that last for decades with minimal maintenance.
🪴 Step 1: Mark Your Edging Layout
Use a garden hose or spray paint to outline where your metal edging will go. I always walk the perimeter first, adjusting the line until it feels visually balanced with your lawn and garden beds. For curves, use a flexible hose or follow the natural flow of your landscape—sharp angles look unnatural and make installation harder.
Check for underground utilities with a metal detector or call 811 before digging. Mark any sprinkler heads or irrigation lines you'll need to work around. The goal is to create a straight, even line that won't interfere with existing landscape features. If you're unsure about the placement, snap a photo and compare it to your lawn's overall design.
✂️ Step 2: Dig a Trench for Secure Placement
Dig a trench 2-3 inches deep along your marked line using a spade or trenching tool. The depth should accommodate the metal edging's height—typically 2-4 inches tall—so the top sits flush with the ground. I like to keep the trench width slightly wider than the edging's base to prevent soil from pressing against it during installation.
Remove any rocks or roots from the trench, as they can cause uneven pressure on the metal. For long runs, use a level to ensure the trench stays perfectly straight. If you hit compacted soil, loosen it with a mattock before proceeding. This step is critical—uneven trenches will make your edging look wobbly once installed.
🌱 Step 3: Install the Metal Edging
Start at one corner of your marked line and press the metal edging into the trench, tapping it firmly with a rubber mallet to seat it evenly. For straight sections, use a level to keep the top edge perfectly horizontal. If you're using interlocking metal edging, connect the pieces by overlapping the ends and securing them with the provided clips or screws.
For curves, cut the metal edging with tin snips to fit snugly around corners or landscape features. I always test-fit a section before securing it—metal expands and contracts with temperature changes, so leave a 1/8-inch gap at joints to prevent warping. Once in place, backfill the trench with the removed soil, tamping it lightly to eliminate air pockets.
💧 Step 4: Secure and Finish the Edging
Use landscape spikes or concrete anchors to secure the edging in place, especially in high-traffic areas or slopes. Drive spikes through the metal and into the soil at 12-inch intervals for straight sections and every 6 inches for curves. This prevents shifting over time. For extra stability, you can also bend the metal slightly into the soil at the base before backfilling.
Rake the soil around the edging to create a smooth transition between the lawn and garden beds. Water the area lightly to settle the soil and check for any gaps where weeds might creep through. Over the next few weeks, monitor the edging for any signs of movement—if you notice shifts, add more spikes or adjust the soil pressure.
☀️ Step 5: Maintain for Long-Term Performance
Metal edging requires almost no maintenance, but I recommend checking it annually for rust or damage, especially in wet climates. If you notice rust spots, clean them with a wire brush and apply a clear automotive sealant to protect the metal. Avoid using harsh chemicals, as they can degrade the finish over time.
To keep the edging looking sharp, trim any grass or weeds that grow against it with a string trimmer or edging tool. I like to do this every 4-6 weeks during the growing season—it prevents the metal from becoming buried or obscured. With proper installation, your metal edging will stay crisp and functional for 20+ years, outlasting plastic or rubber alternatives by decades.
Tips & tricks for perfect metal lawn edging installation
These pro-level insights will help you achieve a flawless, professional-grade finish that stands the test of time.
Layout Precision: Before you even pick up a shovel, take a step back and visualize the final look. Walk the perimeter while holding a garden hose—this lets you adjust the line on the fly without committing to spray paint. I’ve found that curves feel more natural when they follow the existing landscape contours rather than cutting sharp angles. Trust your eye: if something looks off, snap a photo and compare it to your lawn’s overall design before marking.
Trench Perfection: The 2-3 inch deep trench isn’t just about depth—it’s about consistency. Use a level every few feet to ensure the trench stays perfectly straight, especially for long runs. Pro tip: If you hit compacted soil, don’t just dig deeper—loosen it with a mattock first. I learned this the hard way after installing edging that wobbled because of uneven soil pressure. For extra stability, keep the trench width slightly wider than the edging’s base to prevent soil from pressing against it during installation.
Metal Expansion Strategy: Here’s what nobody tells you—metal expands and contracts with temperature changes. That’s why I always leave a 1/8-inch gap at joints before securing the edging. Test-fit each section first, then backfill with soil tamped lightly to eliminate air pockets. This small detail prevents warping over time, especially in hot climates where metal can expand significantly. If you’re using interlocking edging, overlap the ends slightly and secure with clips or screws to maintain a seamless look.
Long-Term Stability: When securing your edging with landscape spikes, focus on high-traffic areas and slopes first. Drive spikes through the metal and into the soil at 12-inch intervals for straight sections, but reduce this to every 6 inches for curves where shifting is more likely. For extra hold, bend the metal slightly into the soil at the base before backfilling—this creates a hidden anchor that prevents movement. After installation, water the area lightly to settle the soil and check for any gaps where weeds might creep through.
Pro Tips for Lawn Edging Metal
- These pro-level insights will help you achieve a flawless, professional-grade finish that stands the test of time.
- Layout Precision: Before you even pick up a shovel, take a step back and visualize the final look.
- Trench Perfection: The 2-3 inch deep trench isn’t just about depth—it’s about consistency.
Frequently asked questions
Got questions about metal lawn edging? You’re in the right place! Whether you're debating materials, installation, or long-term care, here are some of the most common queries—and their straightforward answers.
What’s the best type of metal for lawn edging?
For durability and sharp definition, aluminum or galvanized steel are top picks. Aluminum resists rust and won’t corrode in wet soil, while steel offers extra strength. Avoid copper unless you’re okay with its natural patina over time.
When is the best time to install metal lawn edging?
Install edging in spring or early fall when soil is workable but not frozen. Avoid winter (frozen ground) or peak summer (dry, cracked soil). Pro tip: Mark your edging with spray paint first to visualize the line before digging!
Is metal edging more expensive than plastic or concrete?
Yes, but it’s a long-term investment. Metal costs $1–$4 per linear foot, while plastic runs $0.50–$2 and concrete $3–$8. Metal lasts decades with minimal upkeep, saving you replacement costs.
Can I install metal edging myself, or should I hire a pro?
DIY is totally doable for straight lines with basic tools (shovel, level, mallet). For curves or uneven terrain, a pro ensures precision. Rent a trench cutter if digging by hand feels tedious—it speeds up the process!
How do I prevent metal edging from rusting or shifting?
For rust prevention, coat aluminum with a clear sealant or choose galvanized steel. To lock it in place, bury the bottom 2–3 inches and fill gaps with gravel. Check annually for loose sections and tap them back down with a rubber mallet.
Will metal edging stop weeds from growing between my lawn and garden?
Yes! Metal edging acts as a physical barrier, blocking weed roots. Add a pre-emergent herbicide to the soil before installation for extra weed control. Pair it with mulch on the garden side for best results.
Wrapping up and next steps
Investing in lawn edging metal is a game-changer for any yard—offering durability, sharp definition, and timeless appeal that keeps your landscape looking polished for decades.
Whether you’re tackling a DIY project or hiring pros, the right materials and techniques ensure a flawless finish that stands up to weather, weeds, and time. 💪
Ready to elevate your outdoor space? Start by measuring your yard, gathering tools, and choosing the perfect metal edging—then roll up your sleeves and get to work! Your future self (and neighbors) will thank you.