
Mower
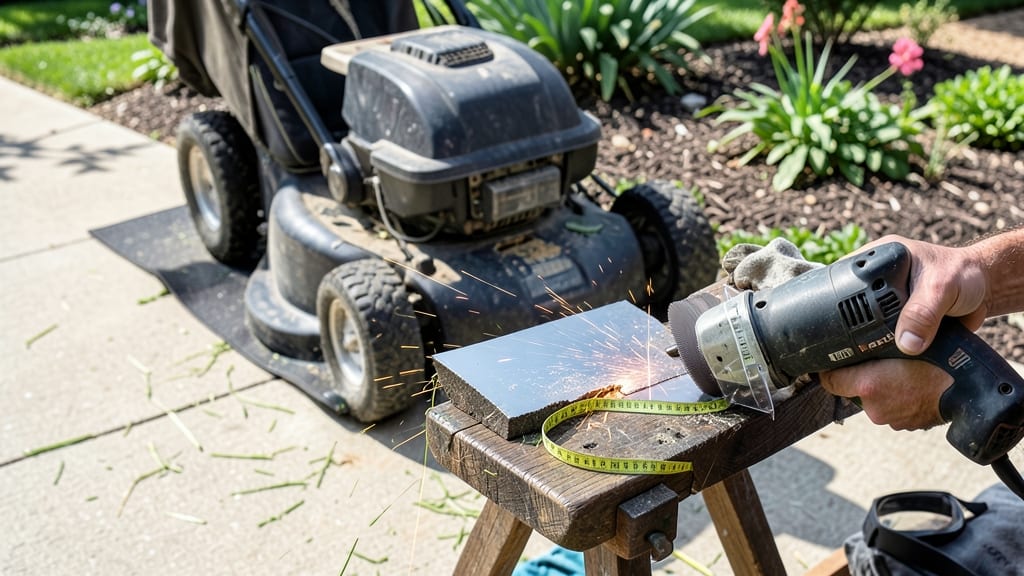
How to sharpen lawn mower blades without removing them saves time and frustration. ✂️ I’ve spent years wrestling with heavy blades and stubborn bolts—until I discovered this method that keeps your mower cutting cleanly in under 20 minutes. The key is using the right tools and technique to reach those edges without disassembly.
You’ll need a file guide (or a piece of wood with parallel lines), a coarse mill file, and safety gloves. Most people overlook the file guide, but it ensures even sharpening and prevents damaging the blade’s balance.
Start by positioning the file at the correct angle—30 degrees for most blades—and work systematically around the edge.
After sharpening, your lawn will look noticeably cleaner, with no more jagged cuts or torn grass. The blades last longer too, since you’re not stressing them with removal and reinstallation. Just remember: one pass per edge is enough—over-filing weakens the metal faster than dull blades ever will.
This method works for both reel mowers and standard rotary blades, though you’ll need to adjust the file angle slightly for different models. Fair warning: the first time feels awkward, but your lawn will thank you for the effort. Here’s how to do it right the first time.
📚 In This Guide
- What you need
- Instructions
- Tips and common mistakes
- Wrapping up and next steps
What you need
- ● File or sharpening tool: A flat file (8–10 inches long) or a mower blade sharpener designed for in-place sharpening. Avoid round files—they won’t work!
- ● Safety gear: Heavy-duty work gloves (cut-resistant preferred)
- ● Safety goggles to protect your eyes from debris
- ● Stable surface: A workbench, sawhorses, or even a solid table to secure the mower while working.
- ● Jack or stands: If your mower isn’t already elevated, use a mower jack or stands to lift it safely (never work on an unstable mower!).
- ● Rag or cloth: To wipe away metal filings and keep your workspace clean.
- ● Angle guide or template: A metal angle guide (or a DIY version made from scrap metal) to maintain the correct sharpening angle (usually 30° for most blades).
- ● Lubricant (oil or wax): A light coat of machine oil or file wax to reduce friction and extend the life of your file.
- ● Flashlight: For better visibility if you’re working in low light.
- ● Mower manual: To double-check blade specifications (like thickness or recommended angles).
Step-by-Step guide to sharpening lawn mower blades in-place
Skip the hassle of removing blades—here’s how to restore a razor-sharp edge right on the mower.
🪴 Step 1: Secure the Mower and Prep the Blade
Start by parking the mower on a flat, stable surface and engaging the parking brake. This prevents any accidental movement while you work. I like to prop the mower on its side—just make sure the blade side is facing up for easy access. If your mower has a blade brake, release it first so the blade spins freely.
Before touching the blade, give it a good visual inspection. Look for deep grooves, uneven edges, or chunks of metal missing—these are signs the blade needs more than just sharpening. If the blade is severely damaged, you’ll need to replace it. For now, assume you’re dealing with a dull edge that just needs a quick refresh.
✂️ Step 2: Use a File or Grinder for Precision Sharpening
Grab a mill file or angle grinder with a mower blade sharpening attachment—both work well for this job. If using a file, I recommend a coarse-tooth type to remove metal quickly without overheating the blade. Hold the file at a 30-degree angle to the blade’s edge, matching the factory bevel. This ensures you’re sharpening the blade correctly without creating a weak spot.
Run the file along the entire edge, applying even pressure. Work in smooth, consistent strokes—don’t rush it. For grinders, keep the blade spinning at a moderate speed (around 3,000 RPM) and move the attachment along the edge in one continuous motion. Stop frequently to check your progress. You’re looking for a uniform, razor-sharp edge—not a jagged or uneven finish.
💧 Step 3: Clean and Test the Sharpened Blade
Once you’ve sharpened all sides, wipe down the blade with a clean rag to remove metal filings and debris. This step is crucial—leftover metal can clog your mower’s deck or damage the engine over time. I also like to spray a light coat of WD-40 or a similar lubricant on the blade to prevent rust and keep it sharp longer.
Before putting the mower back together, do a quick test. Grab a piece of paper and hold it against the blade—if it cuts cleanly, you’ve done it right. If the paper tears or the blade still feels dull, repeat the sharpening process. Never skip this test; a dull blade tears grass instead of cutting it cleanly, leaving your lawn ragged and stressed.
☀️ Step 4: Maintain the Blade for Long-Term Performance
After sharpening, run the mower for about 5 minutes to let the blade cool down and settle into its new edge. This also helps distribute any remaining lubricant evenly. For best results, sharpen the blade every 10-15 hours of mowing time—or whenever you notice the grass starts looking shredded instead of cleanly cut.
Here’s the thing—I know it’s tempting to wait until the blade is really dull, but that’s when you risk damaging the mower or the lawn. A little maintenance now means fewer headaches later. Store your mower in a dry place when not in use, and always remove any grass clippings or debris from the deck after each use. This keeps the blade in top shape between sharpenings.
Tips & tricks for sharpening lawn mower blades in-place
These field-tested tricks will help you sharpen like a pro—without ever removing the blade.
Angle Accuracy: That 30-degree angle in Step 2 is non-negotiable for a clean cut. I use a small angle guide or even a piece of cardboard with the correct angle marked to keep it consistent. If you're unsure, start with the factory bevel as your guide—most blades have this marked. Remember, too steep and you'll weaken the blade, too shallow and it won't cut properly.
Safety First: Never attempt this with the blade spinning—always disengage the brake and work when the blade is completely stopped. I've seen too many close calls where people rush this step. Also, wear safety glasses to protect against any flying metal particles, especially when using an angle grinder. This is one job where safety gear isn't optional.
Paper Test Perfection: The paper test in Step 3 is your quality control moment. For a truly sharp edge, the paper should cut cleanly with minimal resistance. If you're getting ragged edges, you're not quite there yet—go back and sharpen just that section. Pro tip: Use standard printer paper for consistent results; thicker paper might fool you into thinking the blade is sharper than it is.
Maintenance Schedule: The 10-15 hour guideline in Step 4 is perfect for most lawns, but adjust based on your grass type. Bermuda grass, for example, needs sharper blades more frequently than Kentucky bluegrass. I mark my mower's maintenance schedule in my garden journal alongside planting dates—it keeps everything organized. And remember, a little frequent maintenance beats one big sharpening job when the blade is already damaged.
Pro Tips for Sharpen Lawn Mower Blades Without Removing
- These field-tested tricks will help you sharpen like a pro—without ever removing the blade.
- Angle Accuracy: That 30-degree angle in Step 2 is non-negotiable for a clean cut.
- Safety First: Never attempt this with the blade spinning—always disengage the brake and work when the blade is completely stopped.
Frequently asked questions
Got questions about sharpening your lawn mower blades without removing them? You’re not alone! Here are some of the most common concerns—and their answers—to help you tackle the job like a pro.
Can I really sharpen lawn mower blades without taking them off?
Yes! While removing blades is ideal for precision, you can sharpen them in place using a file or grinder designed for curved edges. Just secure the blade firmly to avoid slipping—safety first! For best results, angle the file at 30° to match the blade’s natural curve.
How often should I sharpen blades without removing them?
Sharpen blades every 15–25 hours of use (or sooner if you notice uneven cuts or tearing grass). If you’re using a file, check edges weekly; if using a grinder, every 2–3 months. Dull blades waste fuel and stress your mower’s engine—so stay ahead of the game!
What’s the easiest tool for in-place sharpening?
A curved file or diamond-coated file is your best bet for manual sharpening. For faster results, a battery-powered angle grinder with a cutoff wheel works well—just wear gloves and goggles! Avoid hacksaws; they’re too slow and can damage the blade’s integrity.
What if the blade won’t stay sharp after sharpening?
If edges dull quickly, the blade may be warped or nicked. Try straightening minor bends with a hammer (gently!) or replace it if damage is severe. Also, check for rust or pitting—these weaken blades faster. A wire brush can clean corrosion before sharpening for better longevity.
Will sharpening in place ruin my lawn mower’s performance?
Not if done right! In-place sharpening won’t harm the mower, but poor technique (like uneven filing or overheating the blade) can. Always secure the blade, use the correct angle, and avoid excessive force. A well-sharpened blade improves cutting efficiency, reducing strain on the engine.
Wrapping up and next steps
Sharpening your lawn mower blades without removing them is totally doable—no fancy tools or mechanics required! 🌿 With the right techniques and safety precautions, you’ll keep your mower cutting cleanly and efficiently. Whether you’re using a file, grinder, or even a DIY clamp method, the key is patience and precision.
Now that you’re equipped with the know-how, grab your tools and get to work—your lawn will thank you with a crisp, even cut! For extra longevity, consider sharpening your blades before they get dull again. Happy mowing! ✂️