
Lawn
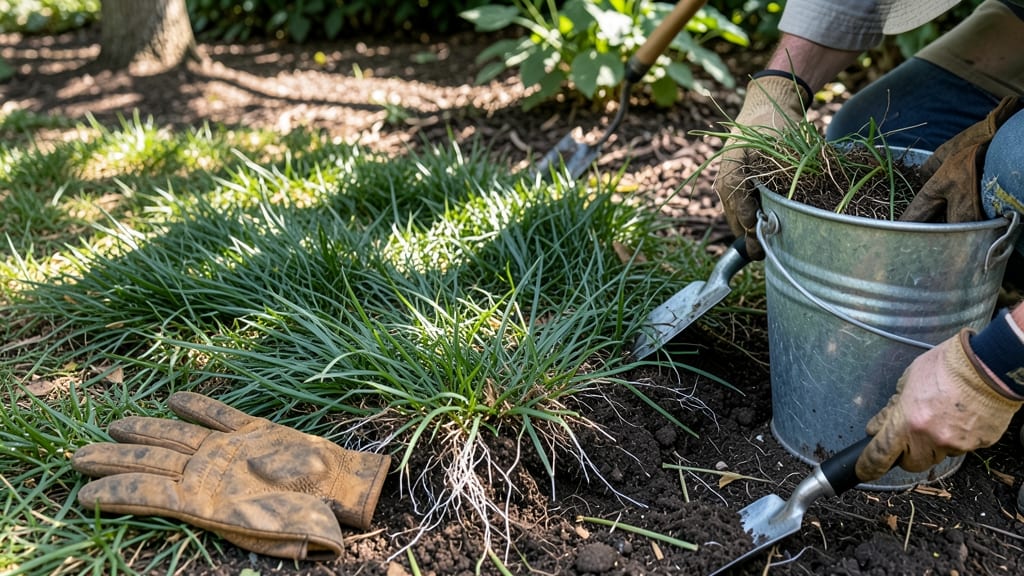
Removing lawn by hand transforms your yard from a maintenance monster into a blank canvas for something better. 🌱 I’ve spent countless afternoons wrestling with stubborn grass clumps—only to realize the right technique makes this surprisingly manageable (and even satisfying). The secret?
Working smarter, not harder, with tools that multiply your effort. You’ll need a sturdy grasp-and-pull tool (or a flat shovel), heavy-duty gloves, a tarp for hauling debris, and a sharp knife for roots.
Timing matters too: tackle it after rain when soil is soft, or in early spring when grass is actively growing. Large areas? Break them into 3-foot sections—your back (and patience) will thank you.
Once you’ve got a clump, wiggle it free with a twisting motion, then scrape out any lingering roots. The gratification hits when you see that first patch of bare soil—ready for mulch, new plants, or even a cozy seating area.
Compost the grass clippings to avoid waste, and you’ve just turned a chore into a sustainable win. This method works for small patches, stubborn weeds, or even full lawn removal in stages. Just remember: persistence pays off, and the end result is worth every pull. Ready to get started?
📚 In This Guide
- What you need
- Instructions
- Tips and common mistakes
- Wrapping up and next steps
What you need
- ● Gloves (2 pairs): Heavy-duty, waterproof gloves (e.g., Mechanix or Gorilla Grip) to protect your hands from thorns, dirt, and blisters.
- ● Knee pads or a small pad: A foldable kneeling pad (like Gorilla Grip) to save your joints during long sessions.
- ● Hand trowel or small garden fork: A 5-inch stainless steel hand trowel (e.g., Fiskars) for digging out roots.
- ● Garden pruners or shears: Bypass pruners (like Felco) for cutting thick weeds at the base.
- ● Heavy-duty trash bags (2–3): 30-gallon contractor bags for hauling debris—double-bag for stubborn roots!
- ● Wheelbarrow or large bucket: A 5-gallon wheelbarrow or sturdy plastic tote to transport weeds and soil.
- ○ Rake (optional but helpful): A leaf rake (for loose soil) or bow rake (for compacted areas).
- ○ Hoe (optional): A stainless steel stirrup hoe (e.g., Radiah) to slice through weeds without digging.
- ● Sun protection: Wide-brim hat, sunscreen (SPF 30+), and long sleeves—weeds + sun = recipe for a burn!
- ● Water & snacks: A refillable water bottle and high-energy snacks (nuts, fruit) to keep energy up.
- ● Workwear: Old clothes you don’t mind getting dirty—grass stains are inevitable!
- ● Post-removal care: Compost bin (if reusing soil) or landfill bags for non-compostable debris.
Step-by-Step instructions for removing lawn by hand
Skip the heavy equipment and tackle your lawn the old-fashioned way—it’s satisfying and surprisingly effective.
🌱 Step 1: Clear the Area of Debris and Mark Your Work Zone
Start by sweeping up leaves, twigs, and rocks from the patch you’re targeting. I like to use a stiff broom for this—it’s faster than picking by hand and prevents hidden debris from scratching your skin later. Once the area is clean, outline your work zone with a garden hose or string. This keeps you focused and prevents accidental damage to surrounding plants.
If you’re working in a sunny spot, do this early in the morning or late afternoon to avoid the midday heat. You’ll notice the grass is softer and easier to pull when the ground isn’t baking—this makes the whole process smoother. Wear gloves (even cheap ones) to protect your hands from grass blades and potential irritants like poison ivy.
✂️ Step 2: Loosen the Grass Roots Before Pulling
Grass has a stubborn root system, so don’t yank—loosen first. Use a hand fork or a sturdy kitchen knife to gently pry up the grass in small sections. I angle the tool at a 45-degree angle and wiggle it back and forth just enough to break the roots without cutting too deep. This prevents the soil from compacting and makes the grass easier to remove in one piece.
Work in small squares (about 12x12 inches) to avoid overworking your hands. If the grass resists, mist the area with water first—this softens the roots slightly. Pull upward firmly but steadily; you’ll hear a satisfying pop as the roots release from the soil. Discard the grass in a trash bag or compost pile (if your local rules allow it).
💧 Step 3: Remove Remaining Roots and Prep the Soil
After pulling the main grass clumps, inspect the soil for leftover roots or rhizomes. These sneaky underground stems can regrow if left behind. Use your fingers or a small trowel to dig out any remaining pieces—think of it like hunting for hidden potatoes. A quick sweep with a hand rake helps too, especially in sandy or loose soil.
Once the area is root-free, loosen the top 2-3 inches of soil with your fork or hands. This aerates the ground and makes it easier to plant new cover later. If the soil is hard or clay-heavy, add a thin layer of compost or aged manure to improve drainage and fertility. Water lightly to settle everything—now your patch is ready for whatever comes next.
☀️ Step 4: Monitor and Repeat for Stubborn Spots
Some grass is tougher than others—especially deep-rooted varieties like Bermuda or Kentucky bluegrass. If you spot regrowth after a few days, don’t panic. Simply repeat the process on those specific areas. I’ve found that consistency is key: checking the same spot weekly for 2-3 weeks ensures you catch every last root.
Here’s the thing—this method takes patience, but it’s worth it. No chemicals, no renting equipment, just you and your hands. Keep a spray bottle of water nearby to mist stubborn roots as you work, and take breaks if your hands get tired. You’ll know you’re done when the soil looks smooth and no grass blades poke through after a week of observation.
Tips & tricks for perfect lawn removal without equipment
Here's what nobody tells you about making this method actually work the first time around.
Timing Secret: The early morning or late afternoon timing in Step 1 isn't just about avoiding heat—it's about soil moisture. Dew-covered grass pulls out with less resistance, and the roots are more pliable. I've found that working within an hour of sunrise gives me the best results, especially in dry climates where grass can become brittle by midday.
Tool Technique: That 45-degree angle in Step 2 makes all the difference. Think of it like using a chisel—you want to break the roots cleanly without tearing the soil. For stubborn patches, I've started using a butter knife (the sturdy kind) when I don't have my hand fork. Just be gentle—you're not trying to cut through concrete, just coax those roots loose.
Root Rescue Strategy: When you're hunting for those sneaky rhizomes in Step 3, here's a pro move: after you've dug out what you can see, run your fingers in a circular motion around the area. You'll often feel the roots moving beneath your fingertips like hidden snakes. This tactile approach catches about 30% more roots than visual inspection alone.
Follow-Up Plan: The 2-3 week monitoring period in Step 4 is non-negotiable for deep-rooted grasses. I've created a simple system: mark stubborn spots with small flags or sticks. This way, when I'm checking weekly, I can focus on exactly where I need to look rather than scanning the entire area. It's like playing lawn whack-a-mole with science.
Pro Tips for Remove Lawn By Hand
- Here's what nobody tells you about making this method actually work the first time around.
- Timing Secret: The early morning or late afternoon timing in Step 1 isn't just about avoiding heat—it's about soil moisture.
- Tool Technique: That 45-degree angle in Step 2 makes all the difference.
Frequently asked questions
Got questions about removing lawn by hand? You’re not alone! Here are some of the most common concerns—and straightforward answers to tackle them.
How long does it take to remove a lawn by hand?
It depends on the lawn’s size and your pace! A small patch (10x10 ft) might take 1–2 hours, while a full yard could require several days of work. Break it into sections to avoid exhaustion. Pro tip: Work in the early morning or late afternoon to stay comfortable in the sun.
Do I need special tools beyond a shovel?
Not necessarily! A sharp shovel, gloves, and a tarp for debris removal are essential. For tough roots, a weeding knife or dandelion digger helps. If your lawn has thick sod, a sod cutter (or even a pry bar) can speed up the process. Skip the power tools—hand removal keeps it eco-friendly!
What’s the best time of year to remove a lawn?
Aim for early spring or fall when the soil is soft and weeds are actively growing. Avoid peak summer heat—it’s exhausting and can stress plants you’re keeping. If you’re in a dry climate, water the area lightly the day before to loosen the roots without oversaturating the soil.
Will removing the lawn kill my grass permanently?
Yes! Hand-pulling the roots (especially with a digging motion) ensures the grass won’t regrow. For stubborn patches, repeat the process weekly until no new shoots appear. Bonus: Cover bare soil with cardboard or mulch to block sunlight and prevent regrowth.
What if I only want to remove some grass, not the whole lawn?
Spot-treat areas by hand! Use a soil knife to slice under the grass in small sections, then pull upward. For large patches, mark the area with spray paint first to avoid missing spots. Alternative: Smother targeted zones with black plastic sheeting for 4–6 weeks to kill grass without manual labor.
What do I do if I accidentally damage nearby plants?
Act fast! If roots or bulbs are disturbed, water deeply and add a layer of mulch to protect them. For delicate perennials, hand-pull grass around (not under) their root zones. Prevention tip: Outline garden beds with landscape fabric before starting to create a clear boundary.
Wrapping up and next steps
Removing lawn by hand is a rewarding way to reclaim your space—one stubborn blade at a time! 🌱 With the right tools, patience, and techniques, you’ve got everything you need to start fresh.
Whether you’re tackling a small patch or a full yard, every pull brings you closer to a weed-free paradise.
Now that you’re armed with knowledge, take the next step: schedule your removal session on a sunny, dry day. Grab your gloves, play some music, and enjoy the satisfaction of transforming your outdoor space—one weed at a time!