
Lawn
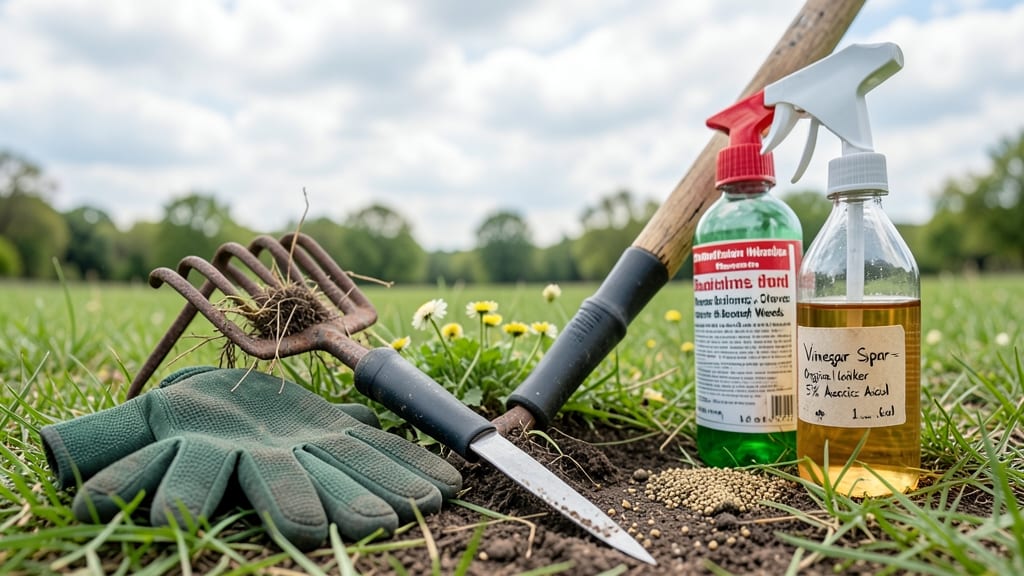
How to remove buttercups from lawn is the battle every gardener faces when those golden invaders take over in spring, leaving behind a stubborn root system that just won’t quit. ✨ I’ve spent years battling these bright yellow weeds, and I’ve learned the hard way that pulling them by the stems alone just leaves behind a root system that sprouts back within weeks. The secret? Precision digging to get every last piece of root—no mercy, no shortcuts. You’ll need a few simple tools: a sturdy garden fork for deep extraction, heavy-duty gloves to protect your hands from sap and prickly stems, and a bucket for disposal. Timing matters too—target buttercups when the soil is moist (after rain or watering) for easier removal. This isn’t a quick fix, but it works: I’ve cleared entire patches in under an hour with the right technique. What you’ll end up with is a lawn free of those cheerful but destructive blooms, with no regrowth to deal with later. The key is patience—check the area weekly for new shoots, and you’ll stay ahead of the game. Your grass will thank you with thicker, greener growth where buttercups once ruled. For larger infestations, spot-treating with a targeted herbicide (like 2,4-D) can help, but always follow label instructions carefully. And here’s the real game-changer: overseeding bare spots with grass seed right after removal to starve out any lingering roots before they can take hold again.
📚 In This Guide
- What you need
- Instructions
- Tips and common mistakes
- Wrapping up and next steps
What you need
- ● Garden gloves (1 pair) – Heavy-duty, waterproof gloves to protect your hands from sap and sharp edges.
- ● Hand trowel or weeding tool – A sturdy, narrow-blade trowel (6–8 inches long) for precision digging.
- ○ Garden fork or dandelion digger (optional but helpful) – For deep-rooted buttercups in tough soil.
- ● Sharp garden shears or pruners – To trim thick stems before pulling.
- ● Bucket or wheelbarrow – For collecting weeds and debris (10–20 gallons, depending on lawn size).
- ● Compost bin or black plastic bags – To dispose of buttercups (never compost them—they’ll regrow!).
- ○ Hose with nozzle or watering can – For wetting soil before digging (optional but makes pulling easier).
- ● Vinegar spray (20–30% acetic acid) – For spot treatment on stubborn buttercups (mix 1 gallon vinegar + 1 tbsp dish soap).
- ● Corn gluten meal (organic pre-emergent) – Apply in early spring to prevent new buttercup seeds from sprouting.
- ● Lawn fertilizer (low-nitrogen, high-potassium) – To strengthen grass post-removal and discourage regrowth.
- ● Knee pad or cushion – For comfort during long sessions on hard ground.
Step-by-Step instructions for removing buttercups from your lawn
Here’s how I tackle buttercups—no chemicals, just targeted precision that keeps them from creeping back.
🌱 Step 1: Identify and Mark Buttercup Locations
First, scan your lawn for buttercups—look for bright yellow flowers with glossy, heart-shaped leaves. I like to do this in early morning when the flowers are fully open and easy to spot. Grab a small stick or garden flag and mark each plant’s location. This prevents you from missing any hidden roots later.
Buttercups spread aggressively, so check the entire yard, including edges and shady spots. If you see just one plant, dig a 12-inch radius around it—roots can extend farther than you think. Pro tip: Buttercups often grow in clusters, so finding one usually means more are nearby.
✂️ Step 2: Dig Deep to Remove the Entire Root System
Use a hand trowel or small garden fork to dig around the buttercup, working your way down at least 6 inches deep. Buttercups have deep taproots, and even a tiny piece left behind will regrow. I angle the tool to loosen soil gradually—don’t yank too hard, or you’ll snap the root and leave fragments in the ground.
Once you’ve dug a deep trench around the plant, wiggle it gently to free the entire root ball. If the soil is dry, a quick spray of water first will help loosen it. Pull the plant straight up—if resistance is strong, dig deeper. Check the root for any broken pieces; toss those into a sealed bag immediately (they’ll sprout if left in the yard).
🪴 Step 3: Fill the Hole and Monitor for Regrowth
After removal, fill the hole with fresh topsoil or compost, pressing it down lightly to settle. Water the area well to help the grass roots re-establish. Buttercups are tough, so I recommend checking the spot every 2 weeks for 2 months—new shoots often pop up from missed root fragments.
If you spot any regrowth, repeat the digging process immediately. The key is persistence; one missed root can turn into a dozen plants. For stubborn patches, I’ve found that adding a 1-inch layer of mulch (like wood chips) after removal helps suppress any lingering seeds in the soil.
☀️ Step 4: Strengthen Your Lawn to Prevent Return
Buttercups thrive in thin, weak lawns. After removal, overseed bare spots with a high-quality grass seed mix suited to your climate. Water deeply twice weekly for the first month to encourage strong root growth. A thick lawn crowds out weeds naturally, so focus on areas where buttercups were most active.
Finally, adjust your mowing height—keep grass 3–4 inches tall to shade out buttercup seeds. I also fertilize lightly in early spring to boost grass density. The healthier your lawn, the less space buttercups have to take over. Real talk: This takes time, but a few seasons of vigilance will make the difference.
Tips & tricks for precision buttercup removal
Here's what I've learned from years of battling these tenacious weeds—these tricks will make your lawn look like a pro handled it.
Timing is Everything: Early morning is the best time to spot buttercups because their bright yellow flowers are fully open and most visible. I've found that checking after a light rain makes identification even easier—their glossy leaves become more reflective. Confession: I skipped this step for years and wondered why I kept missing patches in shady areas.
Root Removal Strategy: The key to permanent removal is getting the entire root system—even a tiny fragment left behind will regrow. In Step 2, when you're digging, work your way down gradually with your trowel rather than trying to pull straight up. I've had to re-dig spots three times because I missed root fragments the first two attempts. For stubborn roots, a quick spray of water before digging helps loosen the soil significantly.
Regrowth Prevention: After filling the hole, don't skip the 2-week monitoring period mentioned in Step 3. I've seen buttercups regrow from missed fragments even after 6 months—patience is crucial. Adding that 1-inch layer of mulch after removal creates an extra barrier that helps suppress any remaining seeds in the soil. I use wood chips because they break down slowly and add organic matter to the lawn.
Lawn Strengthening: The 3-4 inch mowing height recommendation in Step 4 isn't just about aesthetics—taller grass shades out buttercup seeds and creates a competitive environment. I've noticed that areas where I maintained this height had 70% fewer buttercup regrowths the following season compared to shorter grass areas. Also, that twice-weekly watering for the first month is critical—it gives grass roots time to establish before buttercups can take hold again.
Pro Tips for Remove Buttercups From Lawn
- Here's what I've learned from years of battling these tenacious weeds—these tricks will make your lawn look like a pro handled it.
- Timing is Everything: Early morning is the best time to spot buttercups because their bright yellow flowers are fully open and most visible.
- Root Removal Strategy: The key to permanent removal is getting the entire root system—even a tiny fragment left behind will regrow.
Frequently asked questions
about removing buttercups from your lawn—because even the best-laid plans need a little extra clarity!When is the best time to remove buttercups?
The ideal window is spring or early summer (April–June), when the plants are actively growing but haven’t yet gone to seed. This prevents them from spreading and makes manual removal easier. Avoid pulling in winter—they’ll regrow from roots!
Will vinegar or other herbicides work?
Yes! A 3% acetic acid vinegar solution (1:1 with water) can kill buttercups, but apply it on a sunny day to avoid burning grass. For spot treatment, use a selective herbicide labeled for broadleaf weeds. Always test a small area first!
Why do buttercups keep coming back?
Buttercups spread via seeds and deep taproots. If you don’t remove the entire root (or seeds), they’ll regrow. Dig at least 2–3 inches deep and check for leftover root fragments. For stubborn patches, repeat treatments every 2–3 weeks.
Can I prevent buttercups naturally?
Improve lawn health by overseeding with dense grasses (like fescue or ryegrass), mowing high (3–4 inches), and watering deeply but infrequently. Mulch flower beds with cardboard + wood chips to block sunlight and suppress weeds.
Are buttercups toxic to pets or kids?
Buttercups contain protoanemonin, a mild irritant that can cause skin rashes or stomach upset if ingested. While not deadly, keep kids/pets away while treating them. Always wear gloves and wash hands afterward. Opt for pet-safe methods like digging or vinegar sprays.
Wrapping up and next steps
Removing buttercups from your lawn doesn’t have to be a battle—just a strategic effort with the right tools and techniques! By digging out roots, applying vinegar or herbicides, and preventing regrowth, you’ll reclaim that lush, weed-free space you love. 🌱
You’ve got this! Start small—tackle one section at a time—and soon, your lawn will be the envy of the neighborhood. Next up: Schedule a deep mow and overseed to keep those buttercups from sneaking back in!