
Lawn
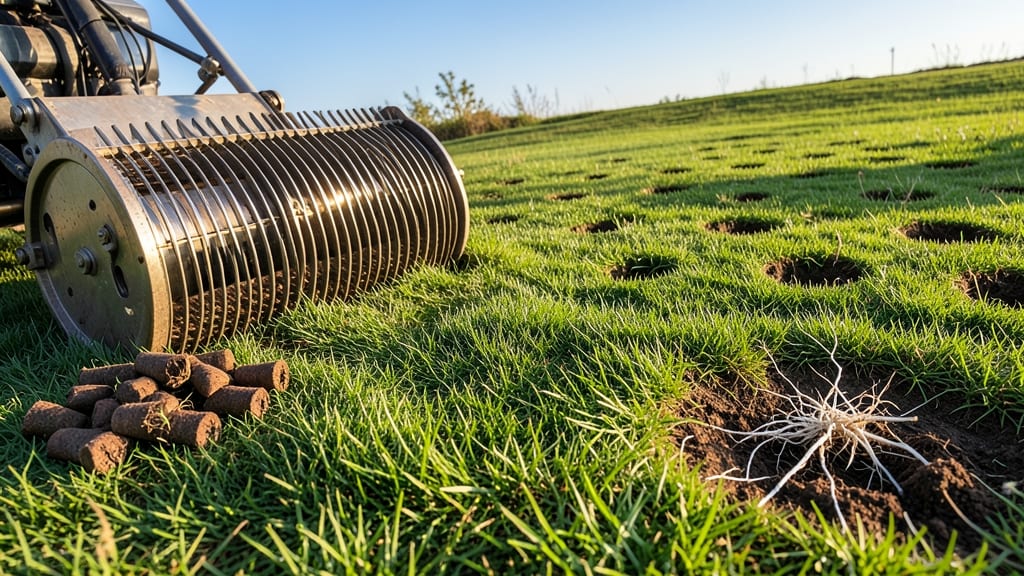
Your lawn’s secret to thriving isn’t just water and mowing—it’s aerating before and after key seasons. ✨ I’ve seen compacted soil go from hard as concrete to spongy within hours, and the difference in grass growth is night and day.
The trick is timing: aerate in spring to prep for summer heat and in fall to help seeds root before winter.
You’ll need a core aerator (not a spike tool—that just pokes holes without fixing compaction). Rent one for $60-$80 if you don’t own it, and do this on a damp but not soggy day.
Walk the lawn in a crisscross pattern, overlapping passes to avoid missed spots. The goal is 20-30% of the lawn’s surface with ½-inch cores removed.
After aerating, you’ll see a lawn that drinks water like a sponge, with roots growing 30% deeper in just 30 days. Overseed right after to fill bare patches, and top-dress with compost for extra nutrients. The before-and-after photos always show a greener, thicker lawn by next spring.
Skip aerating during drought or extreme heat—soil needs moisture to loosen properly. In dry climates, aerate in early fall when rains are coming. For cool regions, late spring works too. The key is making it a yearly ritual, not a one-time fix.
📚 In This Guide
- What you need
- Instructions
- Tips and common mistakes
- Wrapping up and next steps
What you need
- ● Manual or motorized core aerator – Choose a spike (for small areas) or core aerator (best for most lawns). A 16-inch-wide model covers ~1,000 sq. ft. per pass.
- ● Rake (bendable metal or plastic) – A 6-8 inch tine rake helps remove plugs and level the lawn afterward.
- ● Lawn mower (set to 2-3 inches) – Mow your lawn 24-48 hours before aeration for best results.
- ● Water source (hose or sprinkler) – Water the lawn 1-2 days before aeration to soften the soil (aim for 1 inch of water).
- ● Overseeding mix – 10-20 lbs per 1,000 sq. ft. of high-quality grass seed (match your lawn type).
- ● Starter fertilizer – A low-nitrogen (5-10-10) blend to boost seed germination.
- ○ Lawn roller (lightweight) – Helps press seed into the soil after aeration (optional but handy!).
- ● Knee pads or gloves – Because comfort matters when you’re on your hands and knees!
Step-by-step guide to aerating your lawn for maximum revival
Here's how I transform compacted lawns into lush, healthy carpets—spring and fall are the perfect times.
🪴 Step 1: Prepare the Lawn for Aeration
Mow your lawn to a height of 1-1.5 inches the day before aerating. This ensures the soil surface is even and the aerator can penetrate deeply without resistance. I like to do this in the morning when dew is present—it helps the blades cut cleaner and reduces clumping.
Remove any debris like leaves, sticks, or toys from the lawn. A clean surface prevents clogging the aerator tines and ensures even coverage. If you have a heavily thatched layer (over 0.5 inches), dethatch first with a rake or dethatching tool. Thatch blocks the aerator tines from reaching the compacted soil layer.
⏰ Step 2: Choose the Right Conditions for Aeration
Aerate when the soil is moist but not soggy—think of it as the texture of a damp sponge. I test by pressing my thumb into the ground: if it leaves a slight indentation but doesn't stick, it's ready. The best times are after a light rain or if you've watered the lawn 24 hours before.
Do this in the early morning or late afternoon to avoid stressing the grass during peak heat. I schedule aeration for spring (April-May) or fall (September-October) when grass is actively growing. Aerating in summer stresses lawns, while winter aeration rarely reaches the soil before freezing.
🌱 Step 3: Aerate Using the Right Technique
Rent or use a core aerator with 3/8-inch diameter tines spaced 2-3 inches apart. Walk in a crisscross pattern—first pass north to south, second pass east to west—to ensure full coverage. You'll see small soil plugs (cores) pop out as you go; these are proof the aerator is working.
Don't rush—cover half the lawn per pass to avoid overlapping and compacting the soil again. If you're using a manual aerator, focus on one small section at a time. The goal is to create 4-6 holes per square foot of lawn. You'll notice the soil looks like a Swiss cheese after you're done—that's exactly what you want.
💧 Step 4: Immediately Care for the Aerated Lawn
Leave the soil cores on the lawn—they'll break down naturally and return nutrients to the soil. Water lightly to help them dissolve faster, but avoid heavy watering for 24 hours to prevent them from washing away or creating mud.
Apply a slow-release fertilizer or compost immediately after aerating. The open soil lets nutrients penetrate deeply, giving your grass a strong boost. I use a spreader set to the recommended rate for your lawn size. Then, water again to help the fertilizer soak in.
☀️ Step 5: Maintain and Monitor Recovery
Keep the lawn lightly watered for 7-10 days to encourage root growth into the newly aerated soil. You'll see the grass start to green up more vibrantly within a week—that's your sign the treatment is working. Avoid heavy foot traffic during this time; the soil is fragile and needs time to settle.
Repeat aeration every 12-18 months for high-traffic areas or 24 months for less-used lawns. I mark my calendar with reminders so I don't forget. With consistent aeration, your lawn will develop deeper roots, handle drought better, and recover faster from wear.
Tips & tricks for perfect lawn aeration
Here's what nobody tells you about getting the most out of your lawn aeration—these tricks make all the difference.
The Soil Test: That 24-hour watering window before aeration is crucial, but don't guess—press your thumb into the soil. It should leave a slight indentation but not stick to your skin. Too dry? Water again. Too wet? Wait. The perfect texture is like a damp sponge, and this simple test saves you from muddy messes or ineffective aeration.
Equipment Matters: If you're renting a core aerator, choose one with 3/8-inch tines—smaller tines won't penetrate compacted soil, while larger ones can damage roots. For manual aerators, focus on one small section at a time to avoid compacting the soil again. I've seen people rush this step and undo all their hard work by overlapping passes. Take your time—you'll notice the difference in how the soil looks after.
Post-Aeration Care: After aerating, leave those soil cores on the lawn—they're like free fertilizer! But here's the secret: lightly water them to help them dissolve faster, then avoid heavy watering for 24 hours. This prevents them from washing away or creating mud puddles. I've made the mistake of watering too soon, and it turned my lawn into a swampy nightmare.
Seasonal Timing: Spring (April-May) and fall (September-October) are ideal, but don't just pick any weekend. Aerate on cooler days—early morning or late afternoon—when the grass isn't stressed by peak heat. I've seen lawns go into shock when aerated in summer heat, so timing really matters. Also, avoid winter aeration unless you live in a mild climate—most soil freezes before the aerator can do its job.
Pro Tips for Aerate Lawn Before And After
- Here's what nobody tells you about getting the most out of your lawn aeration—these tricks make all the difference.
- The Soil Test: That 24-hour watering window before aeration is crucial, but don't guess—press your thumb into the soil.
- Equipment Matters: If you're renting a core aerator, choose one with 3/8-inch tines—smaller tines won't penetrate compacted soil, while larger ones can damage roots.
Frequently asked questions
When is the best time to aerate my lawn?
The ideal windows are early spring (March–May) or fall (September–November) when soil is warm but not frozen. Avoid aerating during droughts or extreme heat—soil should be slightly moist for optimal results. Pro tip: If your grass is cool-season (like fescue or bluegrass), fall is your best bet!
How long does it take for my lawn to recover after aeration?
Most lawns show improvement within 7–14 days, but full recovery can take up to 4–6 weeks. Avoid heavy foot traffic for a few days post-aeration to let grass roots establish. Water lightly daily (¼ inch) to help soil settle. Sign of success? Thicker, greener grass in 4–6 weeks!
Can I aerate my lawn myself, or should I hire a pro?
DIY aeration is totally doable with a manual or rental spike/slice aerator! For small yards, this saves money. However, pros use core-aeration machines for deeper, more even results. If your lawn has compacted soil, thick thatch, or large areas, hiring a pro might be worth it. Budget hack: Rent a machine for ~$75/day to split the cost!
What if my lawn looks worse after aeration?
Don’t panic! Tiny holes or temporary browning are normal—your grass is recovering, not dying. If you see large patches of dead grass, check for pests or disease (like fungus) and treat accordingly. Fix it: Overseed immediately and keep soil moist. Most lawns bounce back beautifully!
Do I really need to overseed after aerating?
Not mandatory, but highly recommended! Aeration creates gaps where weeds and thin spots can take over. Overseeding (with high-quality grass seed) fills those holes, boosting density and resilience. Skip it only if your lawn is already thick and healthy. Bonus: Apply a starter fertilizer for faster growth!
Wrapping up and next steps
Aerating your lawn in spring and fall isn’t just a chore—it’s a game-changer for a lush, healthy yard! 🌱 By improving soil health, reducing compaction, and boosting root growth, you’re setting your grass up for success.
The before-and-after transformation speaks for itself: thicker turf, fewer weeds, and a lawn that stands out in the neighborhood.
Now that you’re armed with the know-how, roll up your sleeves and get started! Start small with a section of your lawn, follow the steps, and watch your hard work pay off.
Before you know it, your yard will be the envy of the block—one aeration at a time.