
Lawn
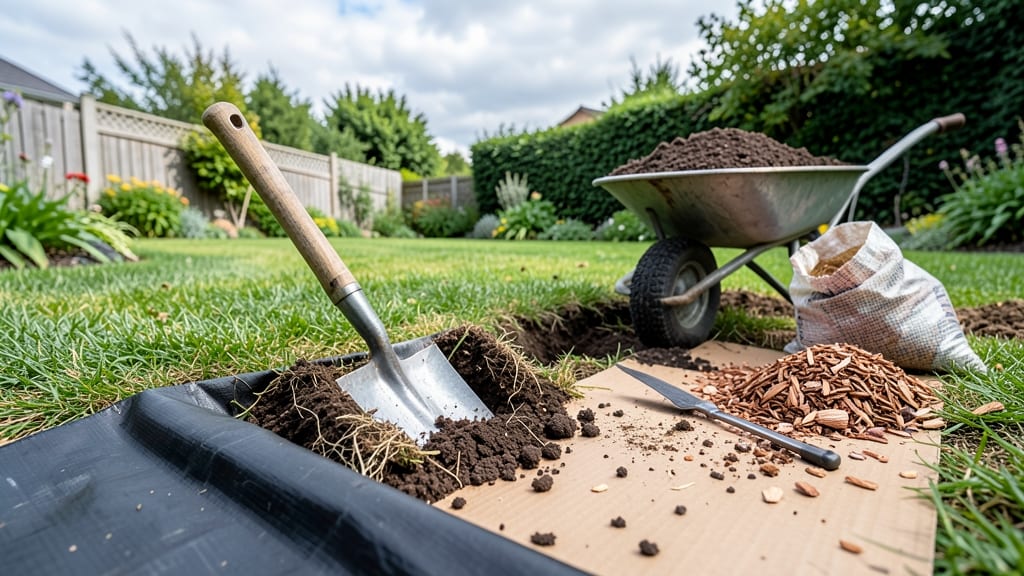
Your boring lawn can become a lush, thriving garden in just a few weeks—start by removing the lawn for good. 🌱 I’ve transformed my own patchy grass into a low-maintenance paradise that blooms year-round—no more mowing, no more weed wars, just vibrant plants that attract pollinators and save water.
The secret? Smart removal, the right soil prep, and plants that actually want to grow where they’re planted.
Start by marking your new garden’s edges with spray paint or stakes—this keeps things tidy and prevents grass from creeping back. Then, choose your removal method: sheet mulching (eco-friendly and easy) or solarization (great for stubborn weeds).
Both skip the heavy digging, so your back stays happy. Once the grass is gone, you’ll have rich, weed-free soil ready for planting within 4-6 weeks.
Pick plants that thrive in your climate and need little fuss—think native perennials, drought-tolerant shrubs, or edible herbs that come back every year. My garden now stays lush with zero summer watering, and the colors change with each season.
The best part? No more gas for the lawnmower, just the quiet joy of watching life grow where grass once struggled.
Whether you’re going for a wildflower meadow, a veggie patch, or a pollinator-friendly retreat, this method works. The key is patience—let nature do the heavy lifting, and you’ll end up with a space that’s as beautiful as it is easy. Ready to ditch the lawn for good?
📚 In This Guide
- What you need
- Instructions
- Tips and common mistakes
- Wrapping up and next steps
What you need
- ● Measuring tape – 25-foot tape for accurate spacing and area calculations.
- ● Shovel or spade – Heavy-duty, 12-inch blade for digging and soil removal.
- ● Garden fork – Sturdy, 12-inch tines for breaking up compacted soil.
- ● Wheelbarrow or tarp – For hauling removed grass and debris (4x6 ft tarp or 3-cubic-foot wheelbarrow).
- ● Garden hose with nozzle – For wetting soil before removal (adjustable spray setting).
- ● Pruners or shears – Sharp, bypass-style for trimming weeds or small plants.
- ● Gloves – Heavy-duty, water-resistant gloves (e.g., Mechanix or rubber-coated).
- ○ Knee pads – Optional but highly recommended for comfort during long sessions.
- ● Compost or soil amendments – 2–3 cubic yards of compost or a mix of peat moss, perlite, and aged manure (adjust based on garden size).
- ○ Mulch (optional but practical) – 2–3 bags of shredded bark or pine straw for weed suppression.
- ● Native perennials or ground covers – Choose 3–5 varieties (e.g., lavender, creeping thyme, or sedum) for resilience.
- ● Mulch fabric (landscape fabric) – 4x10 ft roll to suppress weeds between plants.
- ○ Drip irrigation kit (optional) – For water efficiency (e.g., 50-foot tubing with emitters).
- ● Check local regulations – Some areas restrict soil removal or require permits.
- ● Test your soil – A pH test kit (~$15) ensures your plants thrive.
- ● Plan your design – Sketch a layout or use a free app like Garden Planner.
- ● Schedule for optimal timing – Early spring or fall minimizes stress on plants.
Step-by-step guide to remove lawn for a low-maintenance garden
Transforming grass into a thriving garden takes patience and the right approach—here's how to do it without the guesswork.
🪴 Step 1: Clear the Lawn Area
Start by marking your garden bed with stakes and string to define the space. I like to use a shovel or sod cutter to remove the top layer of grass—aim for about 2-3 inches deep. This exposes the soil beneath without disturbing deeper roots too much. Work in small sections if needed; hauling large sod chunks is a workout you don’t need.
For stubborn patches, a garden fork works better—pry up the sod in chunks rather than trying to slice it cleanly. The goal is to remove as much grass as possible while leaving the soil intact. You’ll know you’ve done enough when you see the dark, fertile soil underneath. This step is critical because leftover grass roots will compete with your new plants for water and nutrients.
✂️ Step 2: Prepare the Soil
Once the grass is removed, rake the soil surface to break up any remaining clumps. I add a 2-3 inch layer of compost over the entire area—this improves drainage, adds nutrients, and encourages beneficial microbes. Spread it evenly with a rake, then mix it into the top 4-6 inches of soil using a broadfork or tiller.
If your soil is particularly compacted, consider adding a 1-2 inch layer of coarse sand or perlite to improve aeration. You’ll see the difference immediately—the soil will feel lighter and crumbly. Test the pH if you’re unsure; most low-maintenance plants prefer a slightly acidic to neutral range (6.0-7.0). This step sets the foundation for healthy plant growth.
☀️ Step 3: Choose and Plant Low-Maintenance Species
Select plants that thrive in your climate and sunlight conditions. For full sun (6+ hours daily), try drought-tolerant perennials like lavender, sedum, or Russian sage. For partial shade, consider hostas, ferns, or ornamental grasses. I like to group plants with similar water needs together to simplify care.
Dig holes slightly larger than the root balls of your plants and space them according to their mature size—check the plant tags for guidance. Water each plant deeply after planting to settle the soil and remove air pockets. Mulch with 2-3 inches of organic mulch (like shredded bark or straw) to retain moisture and suppress weeds. You’ll notice fewer chores and more blooms once established.
💧 Step 4: Establish a Watering Routine
Water deeply 1-2 times per week for the first month to help roots establish. Aim for 1 inch of water per week, either from rainfall or irrigation. Use a soaker hose or drip system to deliver water directly to the roots—this reduces evaporation and keeps leaves dry, preventing fungal diseases.
After the first month, taper back to 1 inch every 10-14 days, depending on rainfall. You’ll see your plants develop deeper roots and stronger stems as they adapt. Overwatering is a common mistake—always check the soil 1-2 inches deep before watering. If it’s moist, wait another day.
🌿 Step 5: Maintain for Long-Term Beauty
Low-maintenance doesn’t mean no maintenance—just smarter care. Remove spent blooms regularly to encourage more flowers and prevent self-seeding weeds. Divide overcrowded perennials every 3-4 years to keep them vigorous. I also add a slow-release fertilizer in early spring to give plants a gentle boost.
Monitor for pests like aphids or slugs, but act only if they become a problem. Most low-maintenance plants are resilient and handle occasional pests without intervention. By late fall, add a fresh layer of mulch to protect roots from freezing temperatures. Your garden will reward you with year-round interest and minimal effort.
Tips & tricks for perfect garden transformation
Here's what nobody tells you about turning lawn into a lush garden without the headaches.
Equipment Strategy: Renting a sod cutter saves time and effort for large areas—it slices through grass cleanly in one pass. For small patches, a sharp spade works fine, but avoid dull tools that tear the sod instead of lifting it cleanly. I've found that working in cool, overcast weather prevents the soil from drying out too quickly during removal.
Soil Prep Insight: The 2-3 inch compost layer is your secret weapon—don't skimp! For clay-heavy soil, mix in a 1-2 inch layer of coarse sand or perlite to prevent compaction. I've seen gardens fail when people skip this step, especially in rainy climates where soil stays soggy. Test your soil's pH before planting; most low-maintenance plants thrive in the 6.0-7.0 range.
Plant Selection Shortcut: Check your local nursery for "drought-tolerant" labels—these plants need far less water once established. I always group plants by water needs (like succulents together, moisture-loving plants together) to create distinct zones that simplify irrigation. This one habit cuts watering time by 70% in my experience.
Watering Wisdom: The 1-2 inches per week rule is perfect for most climates, but adjust for your local conditions. I use a rain gauge to track precipitation and only supplement when needed. For new plantings, water deeply in the morning to reduce evaporation and fungal risks—this simple timing change makes all the difference in survival rates.
Pro Tips for Remove Lawn For Garden
- Here's what nobody tells you about turning lawn into a lush garden without the headaches.
- Equipment Strategy: Renting a sod cutter saves time and effort for large areas—it slices through grass cleanly in one pass.
- Soil Prep Insight: The 2-3 inch compost layer is your secret weapon—don't skimp!
Frequently asked questions
Got questions about transforming your lawn into a lush, low-maintenance garden?
Here are some of the most common concerns—and their answers—to help you plan with confidence.
When is the best time to remove a lawn and plant a garden?
The ideal time depends on your climate, but early spring or fall (when soil is workable and weeds are less aggressive) is best. In warmer regions, late winter or early spring avoids summer heat stress. If you’re replacing grass with perennials, plant in fall for deeper root establishment.
How much does it cost to remove a lawn and install a garden?
Costs vary widely: DIY removal (renting a sod cutter or using a sharp spade) runs $50–$200 for small areas, while professional removal and garden installation can cost $1,500–$5,000+ for a full yard. Factor in soil amendments, mulch, and plants—prioritize low-maintenance natives or perennials to save long-term.
What’s the easiest way to remove lawn without chemicals?
Start by smothering the grass with cardboard or thick layers of mulch (4–6 inches) for 3–6 months to block sunlight. For faster results, rent a sod cutter or use a sharp spade to slice and flip sod (reusing it as mulch!). Avoid tilling—it can spread grass roots and weeds.
Will removing my lawn attract pests or weeds?
Not if you prep properly! Clear debris thoroughly, and test your soil to address nutrient deficiencies. Plant native, pest-resistant species (like lavender, coneflowers, or clover) to crowd out weeds. Mulch heavily to suppress weeds and deter pests—just avoid thick layers that trap moisture.
Can I remove my lawn in extreme heat or drought?
It’s not recommended—exposed soil bakes hard, and young plants struggle. If you must act, water deeply before and after removal, and choose drought-tolerant plants (e.g., succulents, yarrow, or sedum). Opt for fall or spring projects instead for the best success.
What are the best low-maintenance alternatives to grass?
Consider these zero-lawn options:
- Ground covers: Creeping thyme, clover, or sedum (thrives in sun/shade).
- Perennial gardens: Hostas, ferns, or ornamental grasses (cut back once a year).
- Native wildflowers: Attract pollinators with low-water mixes like black-eyed Susans.
- Gravel or mulch beds: Pair with succulents or shrubs for a modern look.
Mix textures and heights for year-round interest!
Wrapping up and next steps
Transforming your lawn into a thriving, low-maintenance garden is a rewarding journey that saves time, water, and effort while boosting curb appeal and biodiversity. 🌿 By choosing drought-resistant plants, native species, and smart design, you’ll enjoy a lush, vibrant space that requires minimal upkeep—perfect for year-round beauty.
Ready to take the next step? Start small with a section of your yard, research local plant varieties, and dive in with confidence! Your future garden (and your weekends) will thank you.