
Lawn
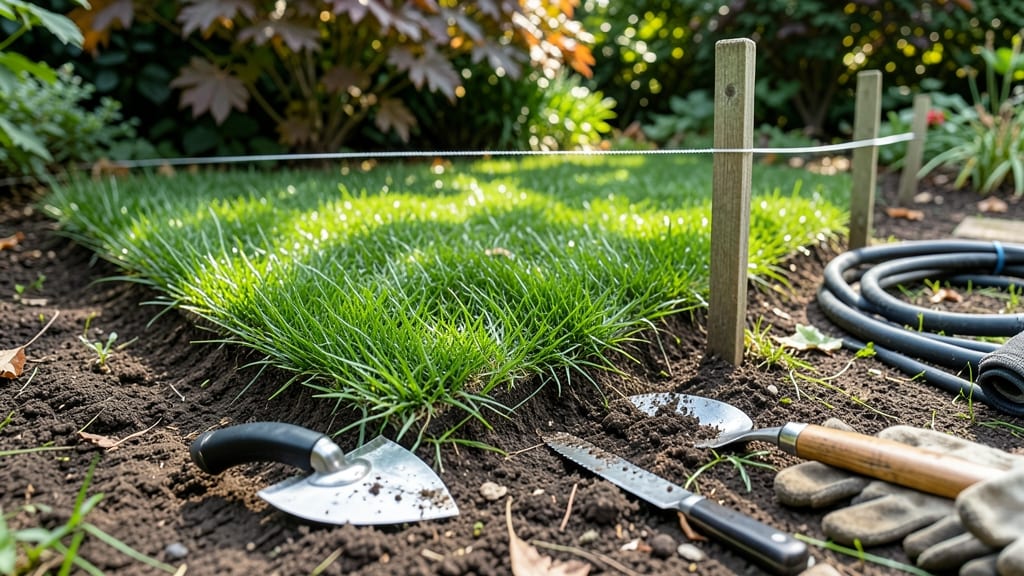
That crisp, defined lawn edge doesn’t require expensive tools—just the right technique. ✨ I’ve learned how to edge a lawn without an edger using everything from a string trimmer to a simple half-moon edger, and the results are just as sharp as anything from a power tool.
The secret isn’t brute force; it’s patience and the right angle.
You'll need a few basic tools: a string trimmer or edger, a straightedge (like a 2x4), a rake, and some chalk or spray paint for marking. Safety first—wear gloves and eye protection, and work when the grass is dry.
Most people overlook how much easier this gets with a marked guide line to follow.
Start by marking your edge with chalk or paint, then work in small sections. Keep your tool at a 45-degree angle and push firmly but steadily—think of it like drawing a straight line in the dirt.
The key is consistency: take your time, and you'll end up with edges that look like they came from a pro.
For follow-up maintenance, touch up edges every 4-6 weeks during growing season. A quick pass with the trimmer keeps weeds from encroaching, and your lawn will stay sharp-looking with minimal effort. This method works for any yard size, from small patches to full borders.
📚 In This Guide
- What you need
- Instructions
- Tips and common mistakes
- Wrapping up and next steps
What you need
- ● Handheld Lawn Edger (or DIY Substitutes): A metal or plastic hand edger (available at hardware stores, ~$15–$30). Look for one with a serrated blade for cleaner cuts.
- ● DIY Alternative: A sharp spade or flat-nosed shovel (if you’re in a pinch—just angle it carefully!).
- ● String Line or Garden Twine: A 10–20 ft. spool (for marking straight edges before cutting). Use chalk or stakes to secure it.
- ● Gloves: A pair of cut-resistant garden gloves (to protect your hands from blades and debris).
- ○ Knee Pads or a Small Stool: Optional but highly recommended for comfort during long sessions.
- ● A hose with a spray nozzle (to dampen the grass slightly—it cuts cleaner when wet!).
- ● Lawn paint or edging dye (for marking edges before cutting, especially around driveways or sidewalks).
- ● A small rake or leaf blower (to clear debris afterward and reveal your crisp new lines).
- ● Safety goggles (if you’re working near rocks or tough roots).
Step-by-Step instructions for creating clean lawn edges without an edger
Here's the method I use to get razor-sharp lawn edges using simple tools you already own.
🪴 Step 1: Gather the Right Tools and Mark Your Edges
You don't need fancy equipment—just a sharp spade, pruning shears, and a measuring tape. First, walk your property's perimeter and visualize where you want the clean edge to fall. Use the tape to mark straight lines along driveways, sidewalks, or flower beds by stretching it taut and using small stakes to hold your desired edge line.
I like to use white garden flags for visibility—they're easier to spot than stakes when you're kneeling to work. For curves, use a flexible garden hose to trace the shape you want before making any cuts. This gives you a clear visual guide that's easy to adjust if needed.
✂️ Step 2: Cut Grass and Weeds Along Your Marked Line
Start by cutting the grass along your marked line with the pruning shears. Cut at a 45-degree angle to create a clean slope that will guide your spade work. This is where sharp tools make all the difference—dull shears will tear the grass instead of giving you that crisp cut. Work in 2-foot sections at a time to maintain control over the line.
For stubborn weeds or thick grass, use the spade to slice vertically down to the root level. I find it helps to step on the grass first to compress it, making it easier to cut through cleanly. The goal is to remove as much of the grass and weeds as possible before you start digging—this prevents regrowth along your new edge.
💧 Step 3: Dig a Clean Edge with the Spade
Position the spade at the 45-degree angle you created with the shears, with the blade just outside your marked line. Push straight down about 2-3 inches deep to create a clean vertical cut. The angle of the spade helps prevent tearing the grass and creates that professional-looking bevel. Work slowly and methodically, checking your line often to maintain consistency.
For curves, use the spade's edge to follow your hose line. You'll notice the grass will naturally fall away from the edge as you work—this is your signal you're on the right track. If you hit rocks or roots, don't force it. Simply adjust your line slightly and continue. I've learned the hard way that forcing the spade can damage your tools and create uneven edges.
☀️ Step 4: Finish and Maintain the Clean Line
After creating the edge, use the pruning shears to trim any remaining grass or weeds that didn't get caught by the spade. This final touch makes all the difference in how polished your edge looks. For a truly professional finish, I like to run a stiff broom along the edge to remove any loose grass clippings and debris that might have fallen during the process.
To maintain your clean edges, I recommend edging every 4-6 weeks during the growing season. You'll see the difference immediately—weeds won't creep into your lawn as easily, and your property will have that well-manicured look without the expense of renting an edger. The key is consistency; even a little maintenance every few weeks keeps the edges looking sharp all season long.
⏰ Step 5: Water and Monitor for Regrowth
After completing the edge, water the area lightly to help settle the soil and encourage any disturbed roots to recover. This isn't about soaking the ground—just a gentle mist to keep things happy. Watch the area over the next 1-2 weeks for any new grass or weed sprouts that might try to encroach on your clean line.
If you notice any regrowth, simply repeat the cutting process with your shears before it gets too tall. I've found that catching these early makes the job much easier. The first few times you edge, you might notice some uneven spots—don't worry, that's normal. With each pass, your technique will improve, and those edges will get cleaner and more consistent.
Tips & tricks for perfect lawn edging without an edger
Real talk: Those crisp, professional-looking lawn edges don't require expensive equipment. With the right technique and these simple tricks, you'll get results that'll make your neighbors wonder how you do it.
Tool Sharpness is Non-Negotiable: I can't stress this enough—dull pruning shears and spades are the #1 reason edges look sloppy. Before you start, take 5 minutes to sharpen your tools with a file or hone them on a sharpening stone. A sharp edge cuts cleanly through grass and weeds without tearing, which means less cleanup and a smoother finish. I keep a small file in my tool shed just for this purpose.
The 45-Degree Angle Secret: That subtle bevel you create in Step 2 isn't just decorative—it's functional. The 45-degree angle guides the spade perfectly and creates a natural transition between lawn and border. To get it right, hold your shears vertically and cut at a slight angle toward the lawn. Think of it like shingling a roof: each cut should overlap just slightly to create that clean, professional slope.
Work in Small Sections: Trying to edge your entire lawn at once is a recipe for frustration. Focus on just 2-foot sections at a time, especially when using the spade. This lets you maintain control over your line and adjust as needed. I like to work clockwise around my yard—starting at the front corner and moving to the right—so I don't accidentally overlap my own work. It also helps you see the progress as you go!
Maintenance is the Real Game-Changer: The 4-6 week maintenance schedule in Step 4 isn't arbitrary—it matches the growth cycle of most weeds. Set a reminder on your phone for every 6 weeks during growing season. Even 10 minutes of quick edging prevents weeds from establishing roots along your clean line. I've seen lawns go from ragged to razor-sharp in just two maintenance sessions after the initial edging.
Pro Tips for Edge A Lawn Without An Edger
- Real talk: Those crisp, professional-looking lawn edges don't require expensive equipment.
- Tool Sharpness is Non-Negotiable: I can't stress this enough—dull pruning shears and spades are the #1 reason edges look sloppy.
- The 45-Degree Angle Secret: That subtle bevel you create in Step 2 isn't just decorative—it's functional.
Frequently asked questions
Got questions about edging your lawn without a dedicated tool? You’re not alone! Here are answers to the most common concerns—plus a few pro tips to make the job easier.
Can I use a shovel or spade to edge my lawn?
Yes! A flat-edged spade or garden edger shovel works great for clean lines. Dig about 2–3 inches deep along the border, then scrape the soil outward to create a sharp edge. For extra precision, use a straightedge tool to guide your cuts.
Is there a best time of year to edge without an edger?
Spring and fall are ideal—soil is softer and easier to work with. Avoid edging during droughts or after heavy rain, as compacted soil makes clean cuts harder. Early morning or late afternoon reduces glare and overheating (especially if you’re using hand tools!).
What’s the easiest alternative to a traditional edger?
A putty knife or plastic lawn edging tool (like a flexible blade) is a game-changer for beginners. For larger areas, a weed whacker with a straight blade can mimic an edger’s precision—just be cautious near sidewalks or driveways!
How do I fix uneven edges after edging?
Rough spots? Use a handheld lawn mower or string trimmer to tidy up, then re-edge with your tool of choice. For stubborn lumps, dig out excess soil with a spade and reshape the border. A level helps ensure consistency if you’re edging against a walkway or fence.
Will edging by hand damage my lawn?
Not if you’re gentle! Stick to the dethatching zone (avoid cutting into grass roots). For grassy edges, use a half-moon edger or serrated knife to trim excess growth without scalping. Always edge away from the lawn to prevent tearing.
Wrapping up and next steps
Edging your lawn without a dedicated tool is totally doable—you just need the right techniques and a little elbow grease! Whether you’re using a shovel, half-moon edger, or even a string trimmer, the key is precision and patience.
With these methods, you can achieve crisp, professional-looking borders that elevate your yard’s curb appeal.
Now that you’re armed with the know-how, grab your tools and get started! For extra flair, experiment with different patterns or pair your edges with mulch for a polished finish. Happy landscaping! 🌿✨