
Lawn
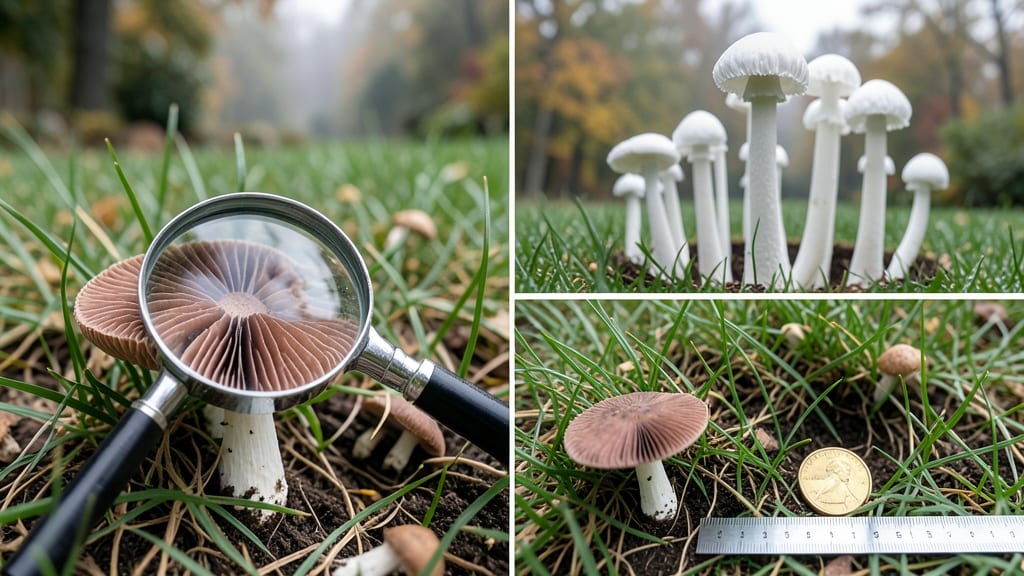
Those mysterious common lawn mushrooms popping up in your lawn aren’t just weird—they’re often a sign your grass is stressed. 🌱 I’ve wrestled with fairy rings, slime molds, and other fungal surprises, and I’ll show you how to identify them and restore your lawn in just 3 days without harsh chemicals.
The good news? Most common lawn mushrooms aren’t harmful to grass, but they’re a red flag for compacted soil, poor drainage, or hidden thatch buildup. The key is addressing the real problem—not just the mushrooms. A simple soil test or a quick raking can make all the difference.
By the end, your lawn will look greener, thicker, and healthier than ever. No more guessing what’s causing those strange circles—just clear, actionable steps to fix it fast. Let’s get started.
First, grab a few basic tools: a garden rake, a soil probe (or a long screwdriver), and a bucket for debris. You might also want a fungal spray (like neem oil or hydrogen peroxide) if the mushrooms keep coming back.
The goal is to loosen compacted soil, improve airflow, and starve the fungi of their food source.
Start by identifying the type of mushroom—fairy rings, slime molds, or parasitic fungi all need slightly different fixes. Fairy rings? Aerate the ring’s edge and overseed. Slime molds? Just hose them off—they’re harmless but unsightly. Parasitic fungi? That’s when you’ll need to dig deeper (literally) and adjust your watering habits.
Prevention is easier than cleanup. Test your soil every spring, avoid overwatering, and keep thatch under ½ inch thick. With these tweaks, your lawn stays lush and mushroom-free—no more surprises popping up after a rainstorm.
📚 In This Guide
- What you need
- Instructions
- Tips and common mistakes
- Wrapping up and next steps
What you need
- ● Gloves (nitrile or rubber) – 1 pair (to protect your hands from spores and moisture).
- ● Knee pads or a small stool – For comfortable ground-level work.
- ● Small trowel or garden spade – For gently lifting mushrooms and inspecting roots.
- ● Spray bottle (8–16 oz) – For applying targeted treatments (e.g., vinegar, hydrogen peroxide).
- ● Measuring cup or sprayer – To mix and apply solutions precisely.
- ● Notebook & pen – For logging mushroom types, locations, and progress.
- ● Digital camera or phone – To document mushrooms for ID (apps like iNaturalist or PictureThis can help!).
- ● Mushroom identification guidebook or Field Guide to Common Lawn Fungi (for DIY experts).
- ● Compost or mulch – 2–3 bags (to improve soil health if mushrooms are beneficial).
- ● Fungicide (organic or chemical) – Copper fungicide or neem oil spray (if mushrooms are harmful).
- ● Soil pH test kit – To check if your lawn’s acidity/alkalinity is contributing to mushroom growth.
- ● Rain barrel or extra watering can – For post-treatment hydration (if mushrooms are edible or beneficial).
How to eliminate common lawn mushrooms for a healthier turf
Lawn mushrooms aren't just unsightly—they signal compacted soil and excess moisture. Here's how to restore your lawn's health in just three days.
🌱 Step 1: Identify and Remove Mushrooms Completely
Pull mushrooms at the base where the cap meets the stem, then dig out the entire underground mycelium network with a garden fork. I use a 2-inch deep excavation around each cluster to break up compacted soil and expose roots to air. This prevents regrowth from hidden spores.
Don't just chop them off—mushroom caps can regenerate if the mycelium remains. Wear gloves (some varieties irritate skin) and dispose of removed mushrooms in yard waste, not compost. You'll know you've done this right when no new caps appear within 24 hours.
💧 Step 2: Aerate and Improve Soil Drainage
Rent a core aerator or use a manual garden fork to create 3-4 inch deep holes every 3-4 inches apart across the affected area. This relieves compaction that traps moisture—mushrooms thrive in soggy conditions. Follow up by top-dressing with ¼ inch of coarse sand or perlite to improve drainage.
Water lightly after aerating to help particles settle. You'll see immediate improvement as water drains faster, but the real test comes after 48 hours—if puddles persist, you'll need to add more sand or consider installing French drains along low spots.
☀️ Step 3: Adjust Watering and Fertilizing Practices
Reduce irrigation to 1 inch per week total (including rainfall) and water deeply 2-3 times weekly instead of daily light sprinkles. Mushrooms love consistent moisture, so let the top 2 inches of soil dry between waterings. Use a rain gauge to track amounts—overwatering is the #1 cause of recurrence.
Apply a low-nitrogen fertilizer (like 0-10-10) to encourage deep root growth rather than top growth. Avoid fresh grass clippings or compost piles nearby—they add organic matter that mushrooms feed on. Within 72 hours, you should see no new mushroom growth if moisture levels are correct.
✂️ Step 4: Prevent Future Outbreaks with Cultural Practices
Mow higher (3-4 inches) to shade the soil and reduce moisture evaporation. Overseed bare spots with a drought-tolerant grass mix like tall fescue or Kentucky bluegrass to crowd out mushrooms. I also recommend spreading ½ pound of lime per 100 sq ft if your soil pH is below 6.0—mushrooms favor acidic conditions.
Finally, remove any thatch buildup with a dethatching rake. Thick thatch layers trap moisture and block air circulation. You'll know your lawn is recovering when mushrooms disappear completely and grass grows uniformly green within 2-3 weeks.
Tips & tricks for eliminating lawn mushrooms effectively
When dealing with lawn mushrooms, the devil is in the details—and the roots. Here's what I've learned from turning my own mushroom-infested lawn into a healthy, pest-free carpet in record time.
Root Removal is Non-Negotiable: In Step 1, when you dig out those mycelium networks, go deeper than just the visible roots. Use your garden fork to create a 3-inch deep trench around each cluster—this disrupts the hidden mycelial threads that can regenerate mushrooms. I've seen cases where homeowners only removed the visible parts, and mushrooms popped back within 48 hours. Don't make that mistake! The key is breaking up that underground network completely.
Drainage Testing After Aeration: After completing Step 2 with your 3-4 inch deep aeration holes, perform a simple test: Water the area and observe after 48 hours. If water still pools in depressions, you need to go further. Add another ¼ inch layer of coarse sand or consider installing shallow French drains in problem spots. This isn't just about looks—proper drainage prevents that perfect mushroom-growing environment.
Watering Schedule Precision: The 1 inch per week guideline in Step 3 is your new mantra. Use a rain gauge to track rainfall so you don't overcompensate with irrigation. I recommend watering in the early morning to allow maximum evaporation during the day. And here's a pro move: After your 2-3 weekly deep waterings, let the top 2 inches dry completely before watering again. This breaks the moisture cycle mushrooms love.
Fertilizer Timing Matters: When applying that low-nitrogen fertilizer in Step 3, do it after your first proper watering session. This ensures the nutrients reach the roots rather than sitting on the surface where they can encourage fungal growth. I've found that applying fertilizer when the soil is already slightly dry helps prevent mushrooms from getting a nutritional boost from the process.
Pro Tips for Common Lawn Mushrooms
- When dealing with lawn mushrooms, the devil is in the details—and the roots.
- Root Removal is Non-Negotiable: In Step 1, when you dig out those mycelium networks, go deeper than just the visible roots.
- Drainage Testing After Aeration: After completing Step 2 with your 3-4 inch deep aeration holes, perform a simple test: Water the area and observe after 48 hours.
Frequently asked questions
Got questions about those mysterious mushrooms popping up in your lawn?
You’re not alone! Here are some of the most common concerns—and straightforward answers to help you tackle them without stress.
Are lawn mushrooms harmful to grass or pets?
Most common lawn mushrooms (like Agaricus bisporus or Coprinus species) are harmless to grass—they’re just decomposing organic matter. However, some pets (especially dogs) may nibble on them, which can cause mild stomach upset. If you’re worried, simply remove them and dispose of them in the trash.
How long does it take for mushrooms to disappear after treatment?
With the right approach (like improving drainage, removing organic debris, or applying a fungicide if needed), you’ll typically see a noticeable reduction in mushrooms within 3–7 days. For stubborn patches, repeat treatments may be necessary. Patience is key—don’t expect overnight miracles!
Can I prevent mushrooms from coming back next year?
Focus on three key fixes:
- Improve drainage—mushrooms love soggy soil. Aerate compacted areas or redirect water flow.
- Reduce organic buildup—rake up fallen leaves, twigs, and thatch to remove their food source.
- Adjust mowing habits—cut grass slightly shorter (but not scalped!) to limit moisture retention.
What’s the difference between mushrooms and slugs or snails?
Mushrooms are fungi with stems and caps, often growing in clusters. Slugs/snails leave slime trails and irregular holes in leaves or grass. If you spot slimy damage, you’re dealing with pests—not fungi. Use iron phosphate baits or beer traps for slugs instead of fungicides.
Are there cheap or natural ways to get rid of lawn mushrooms?
Yes! Skip the expensive fungicides and try these budget-friendly fixes:
- Spread lime or sulfur (follow package rates) to alter soil pH.
- Apply cornmeal (yes, really!)—it disrupts fungal growth naturally.
- Use a shop vacuum to suck up mushrooms and roots (wear gloves!).
Wrapping up and next steps
Transforming your lawn into a thriving, pest-free paradise in just three days is absolutely doable—especially with the help of nature’s own cleanup crew: common lawn mushrooms! 🌱 These fungi aren’t just fascinating; they’re your secret weapon for reviving soil, breaking down thatch, and keeping pests at bay without harsh chemicals.
Now that you’re armed with the right materials and answers to common questions, it’s time to roll up your sleeves and take action. Start small—pick a corner of your lawn, gather your supplies, and give this natural method a try.
Before you know it, you’ll be sipping lemonade on a lush, green carpet of grass, proud of your eco-friendly lawn revival!